The 10 Most Effective Lower-Body Moves for Bad Knees
If moves like lunges or box jumps aren’t ideal for your knees*, it can be tough to find suitable alternatives to these traditional moves. The good news is that there are still plenty of ways to sculpt and shape your bottom half—without the possible knee strain.
Here are 10 low-impact, knee-friendly exercises to try:
Lateral Band Walk
Targets: Inner and outer thighs, hips, glutes
To do it: Stand on a resistance band with feet hip-width apart, knees slightly bent, holding onto handles evenly (depending on your band’s thickness, you may need to cross it as shown for more resistance).
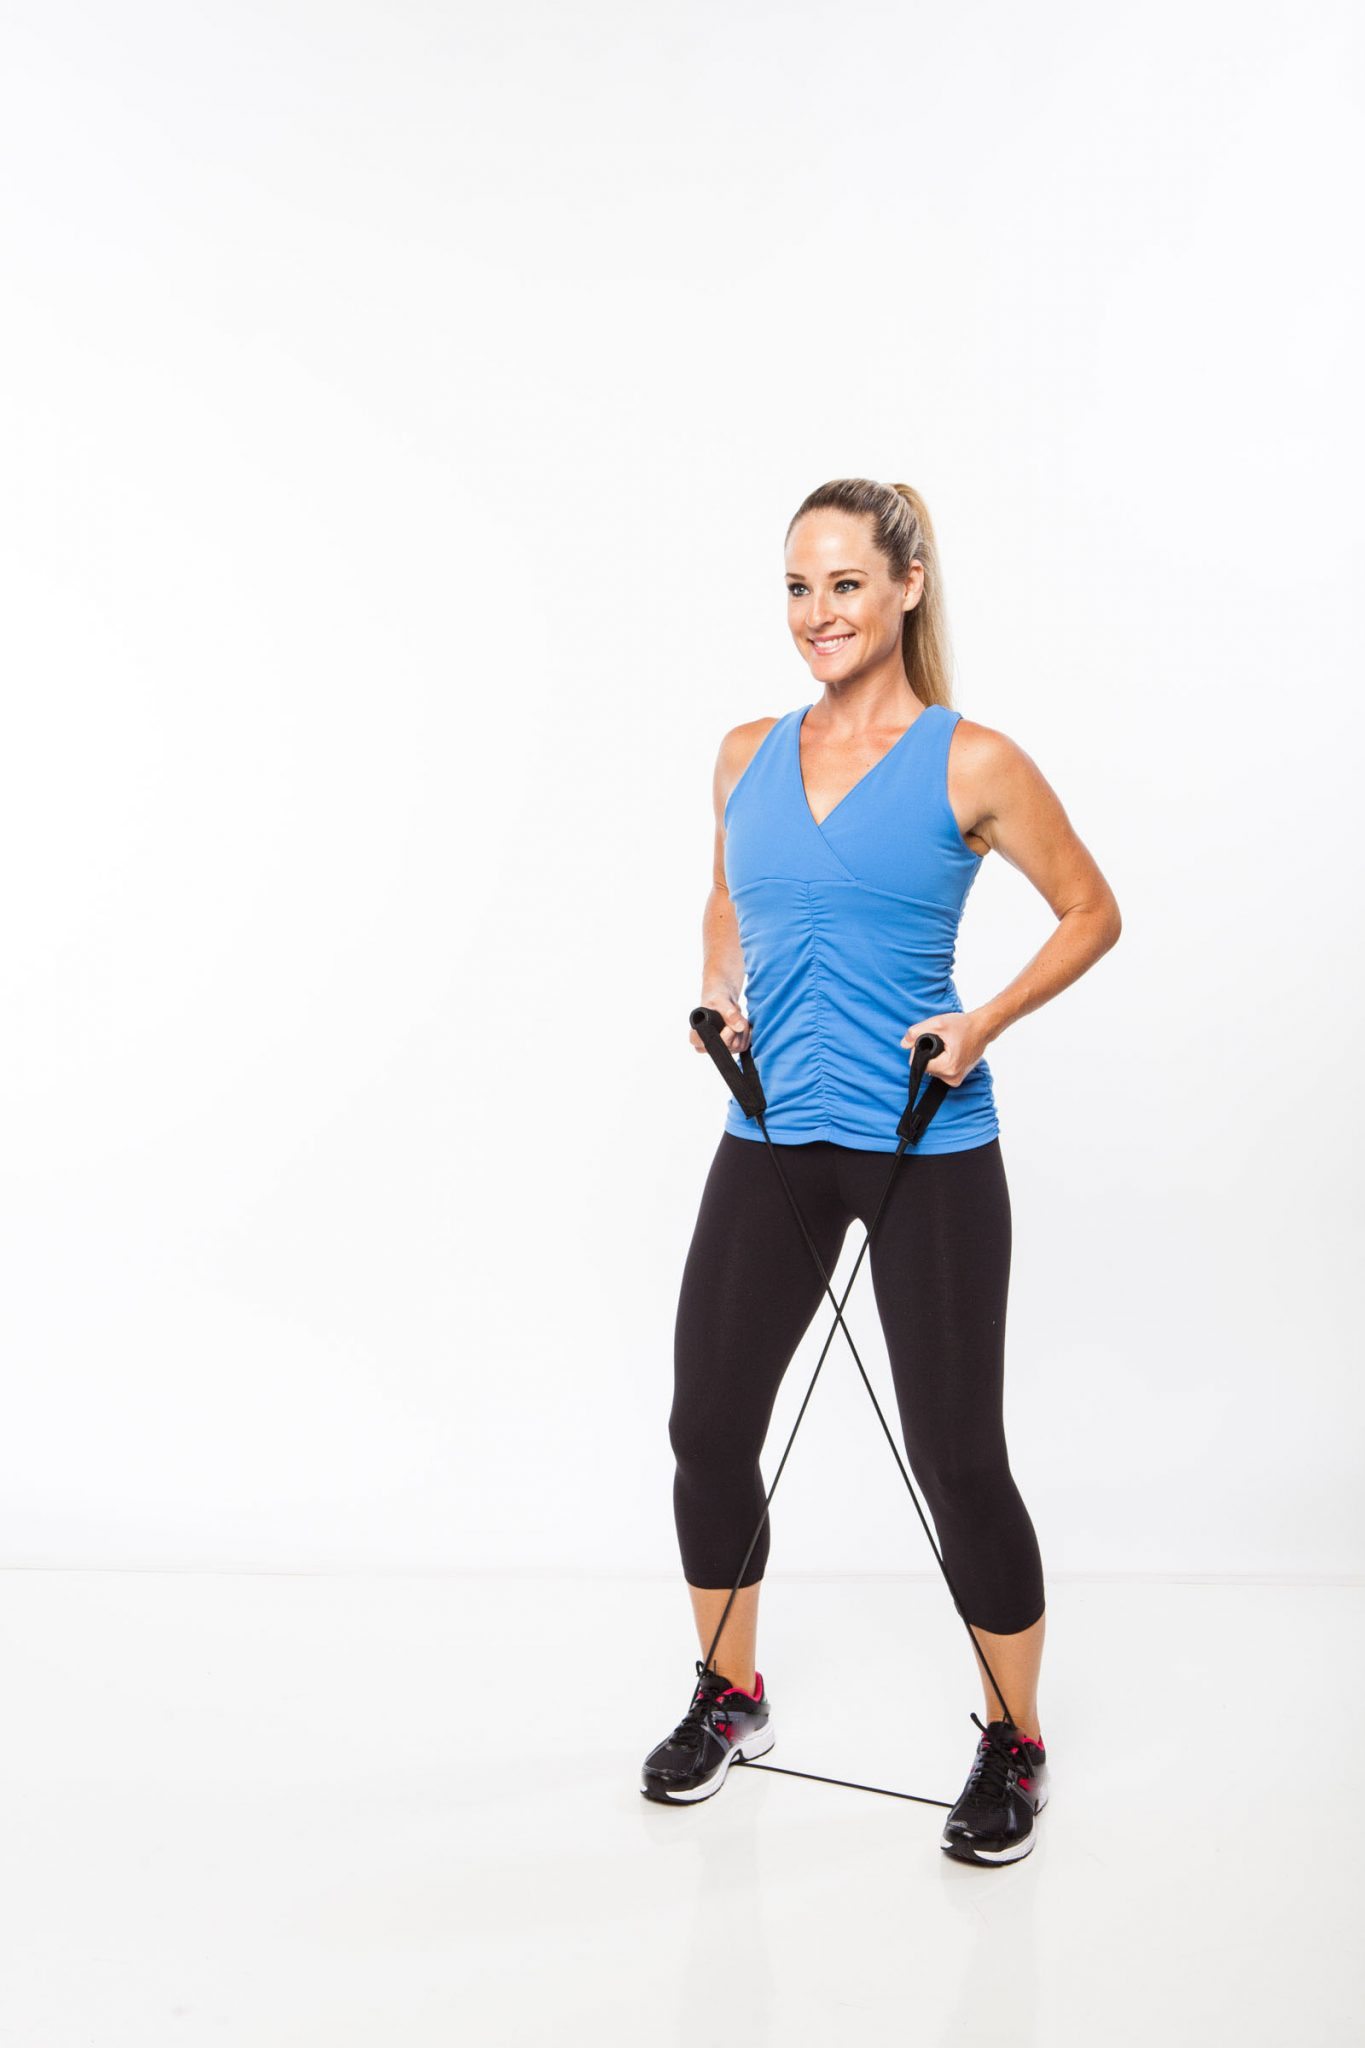
Pull your abs in tight, and, keeping your knees slightly bent, take a wide step out to one side with one foot [B]. Step the opposite foot in, traveling to the side and returning to start position (avoid letting feet come any closer than hip-width apart). That’s one step. Take 20 steps, then repeat on the opposite side. Try up to 3 sets in total.
Split Stance Dead Lift
Targets: Glutes, hamstrings, back
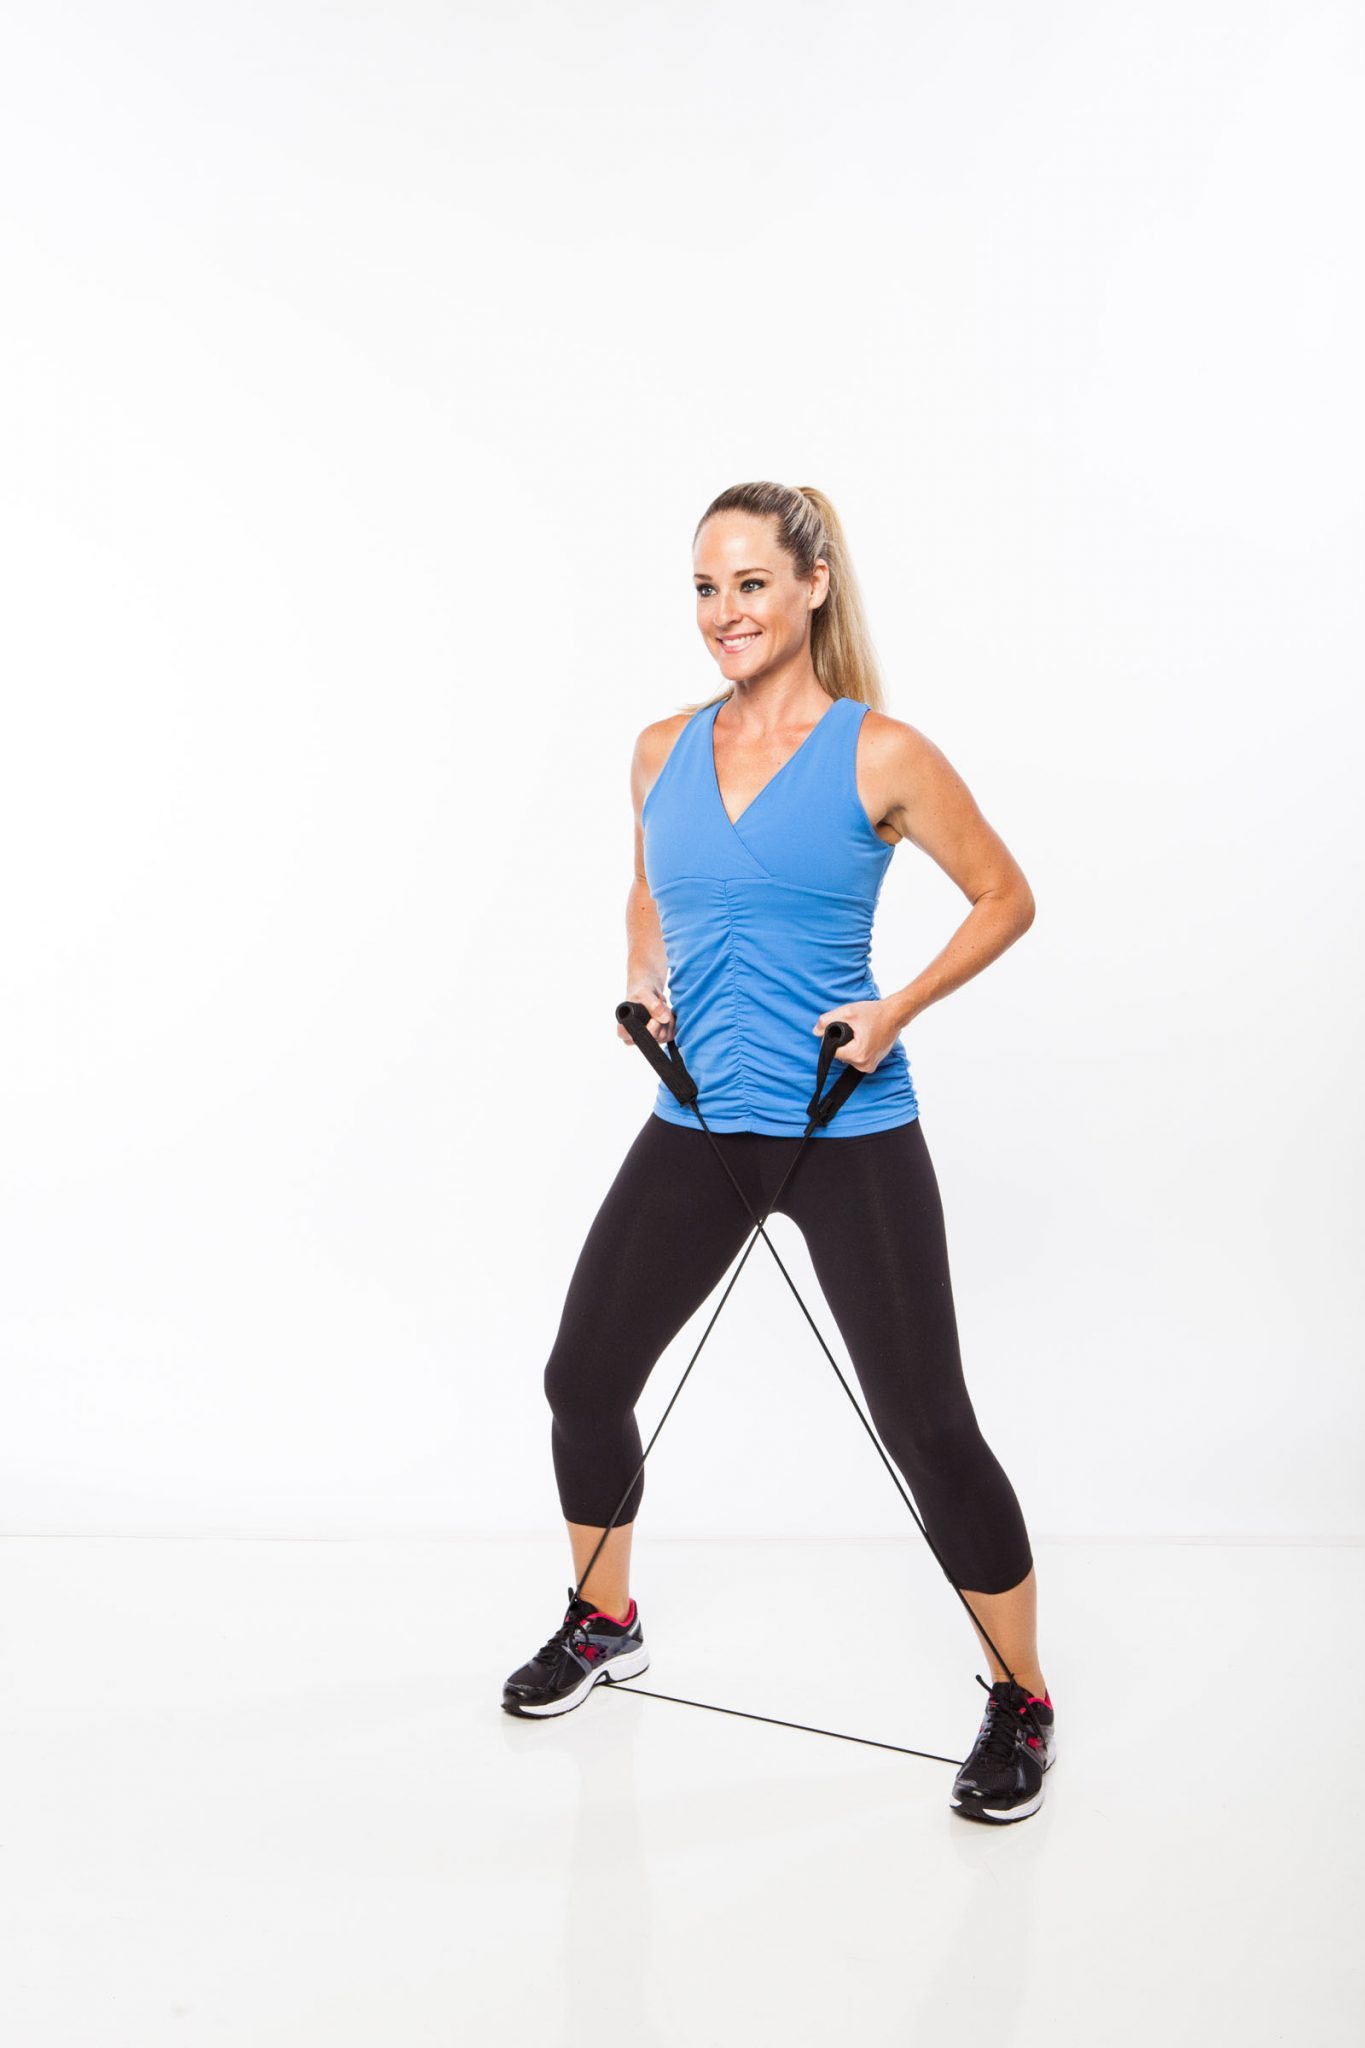
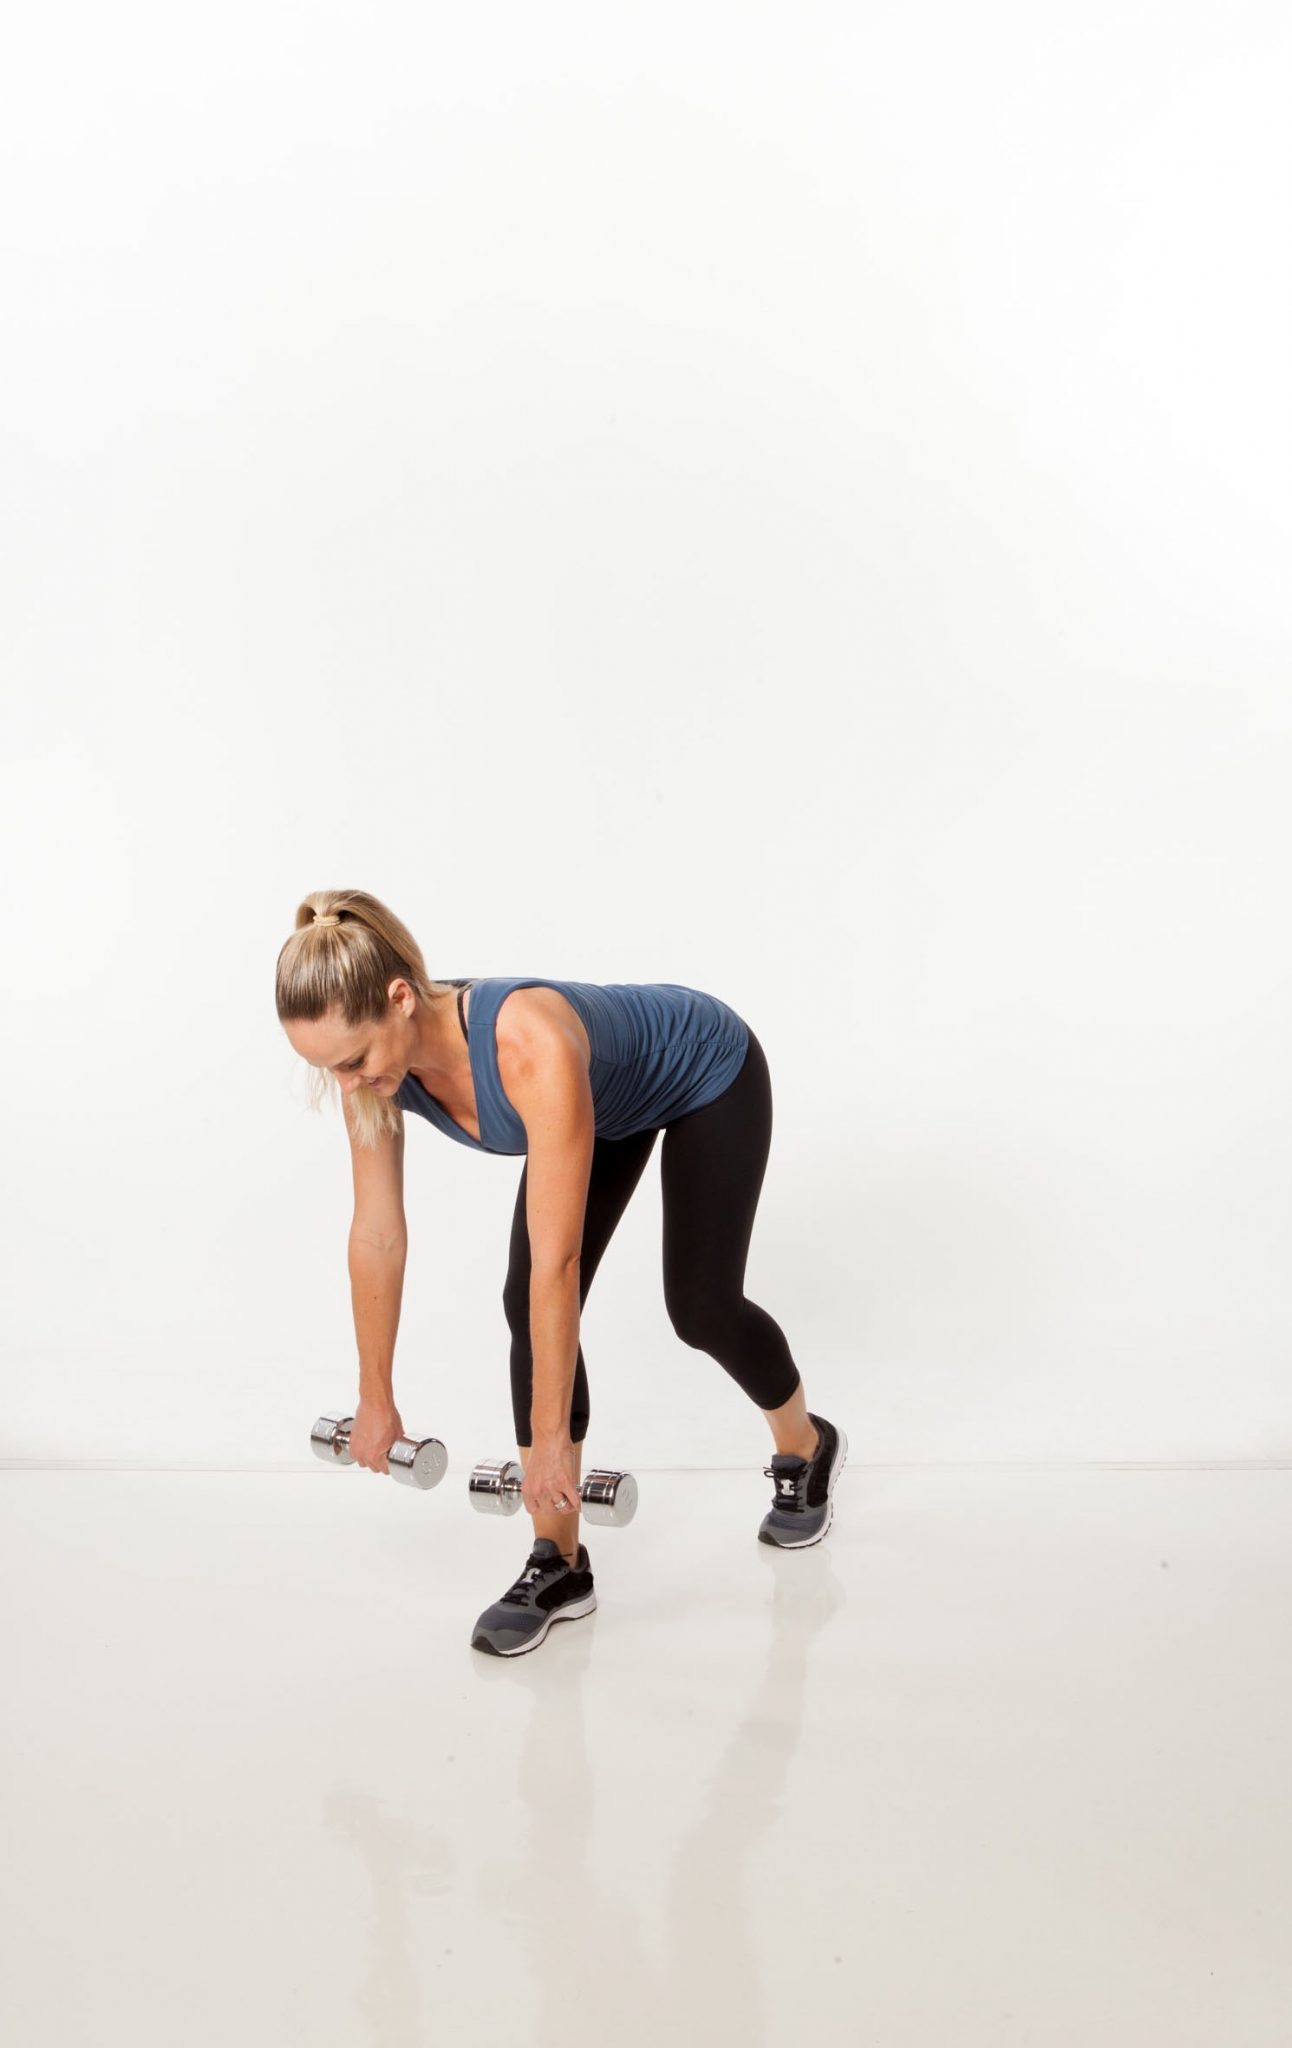
To do it: Begin in a split stance with one leg forward and the back heel lifted, knees slightly bent, holding a dumbbell in each hand with palms facing thighs.
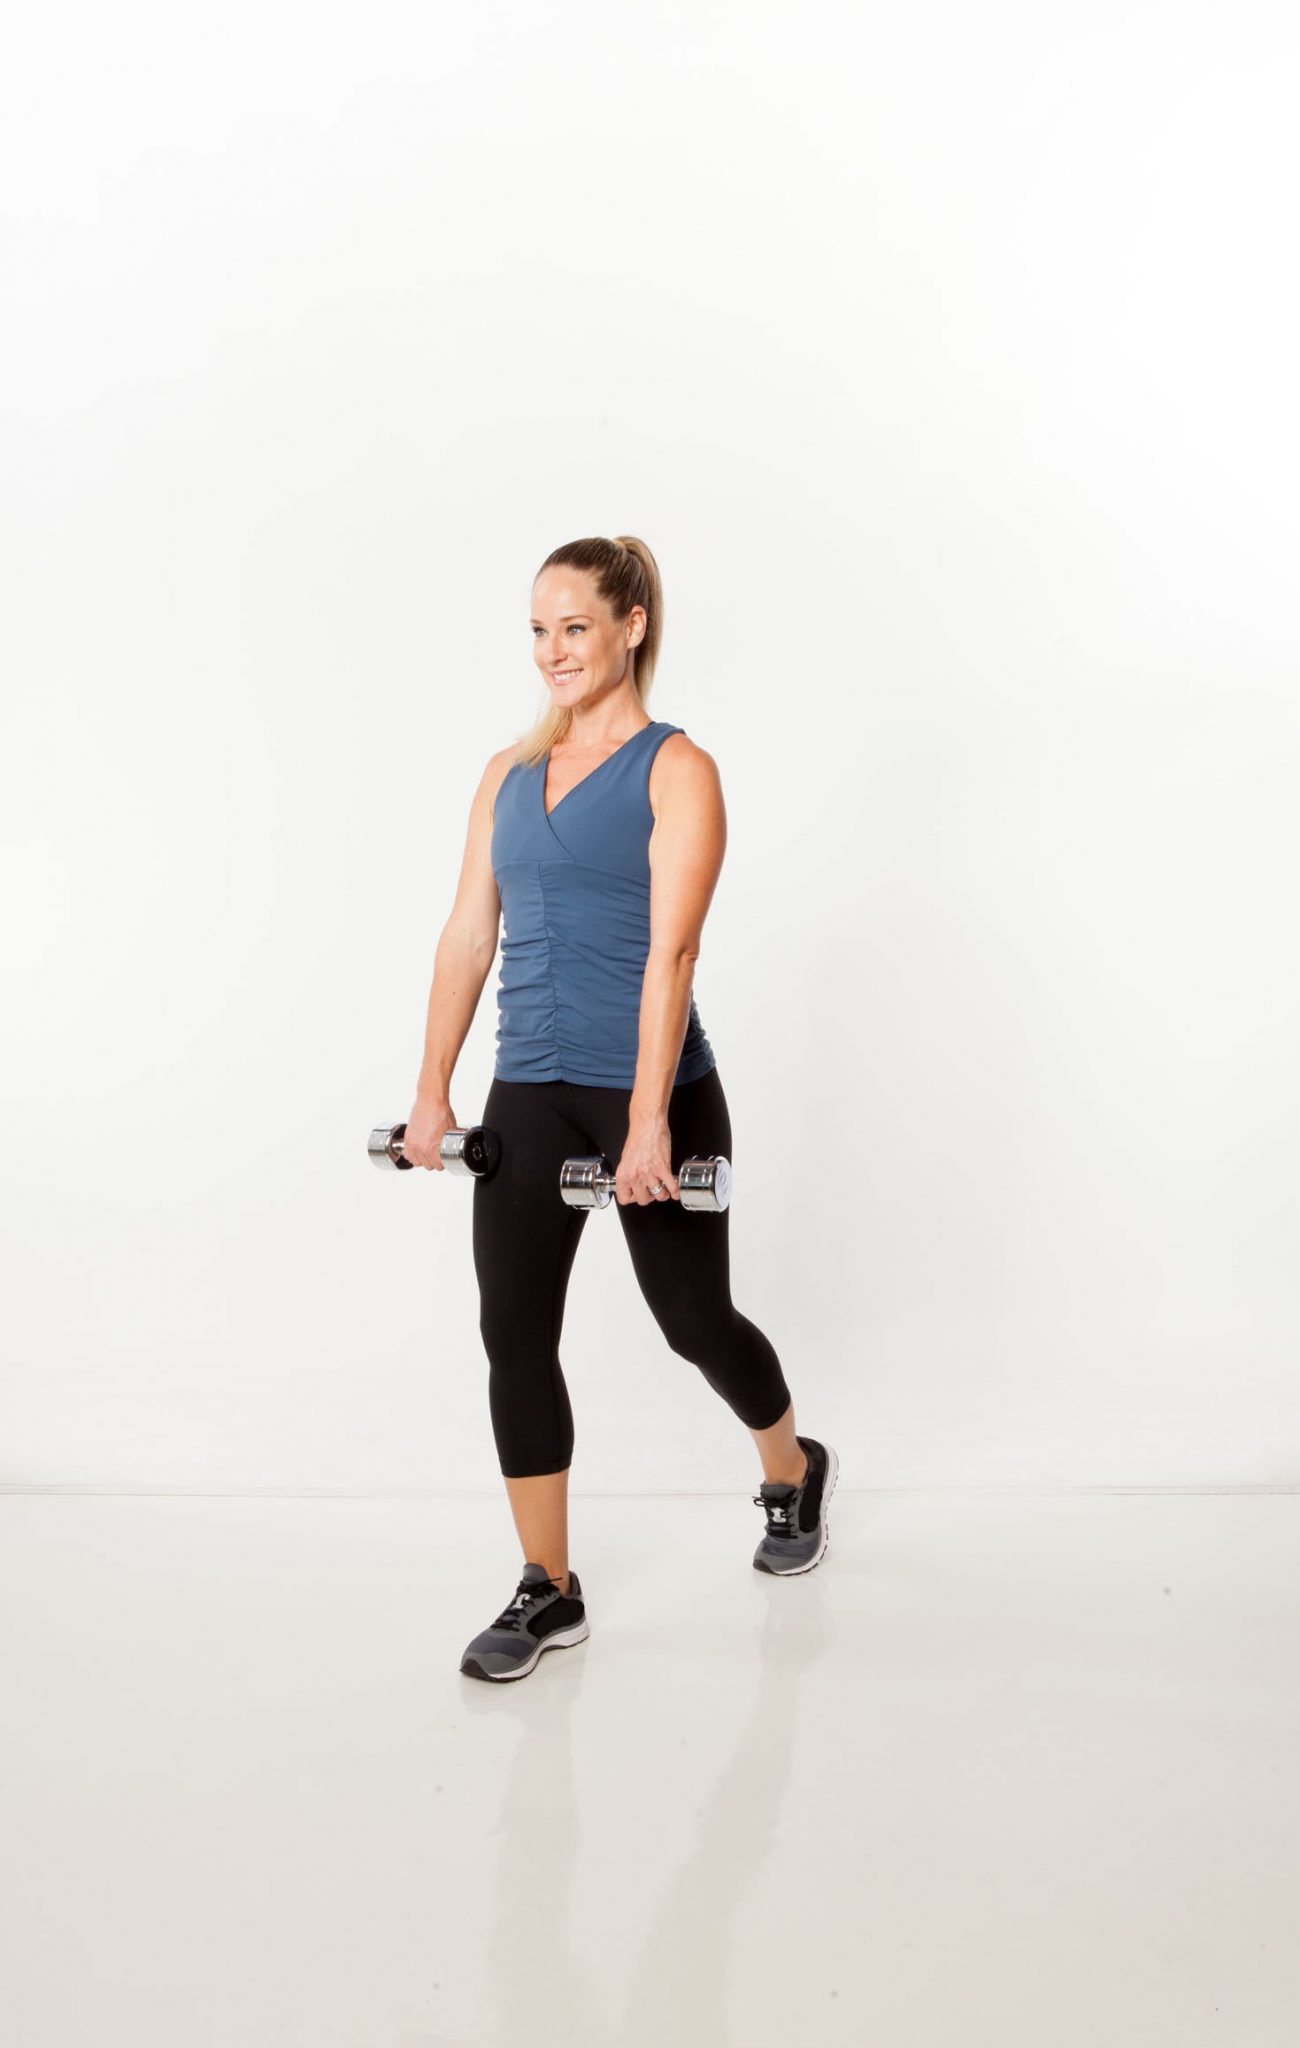
Hinge forward from the hips, keeping your spine neutral and abs drawn in tight, until your torso is almost parallel to the floor. Return to the start while maintaining a neutral spine. Try up to 3 sets of 15 reps on each leg.
Static Squat Sit
Targets: Thighs, glutes
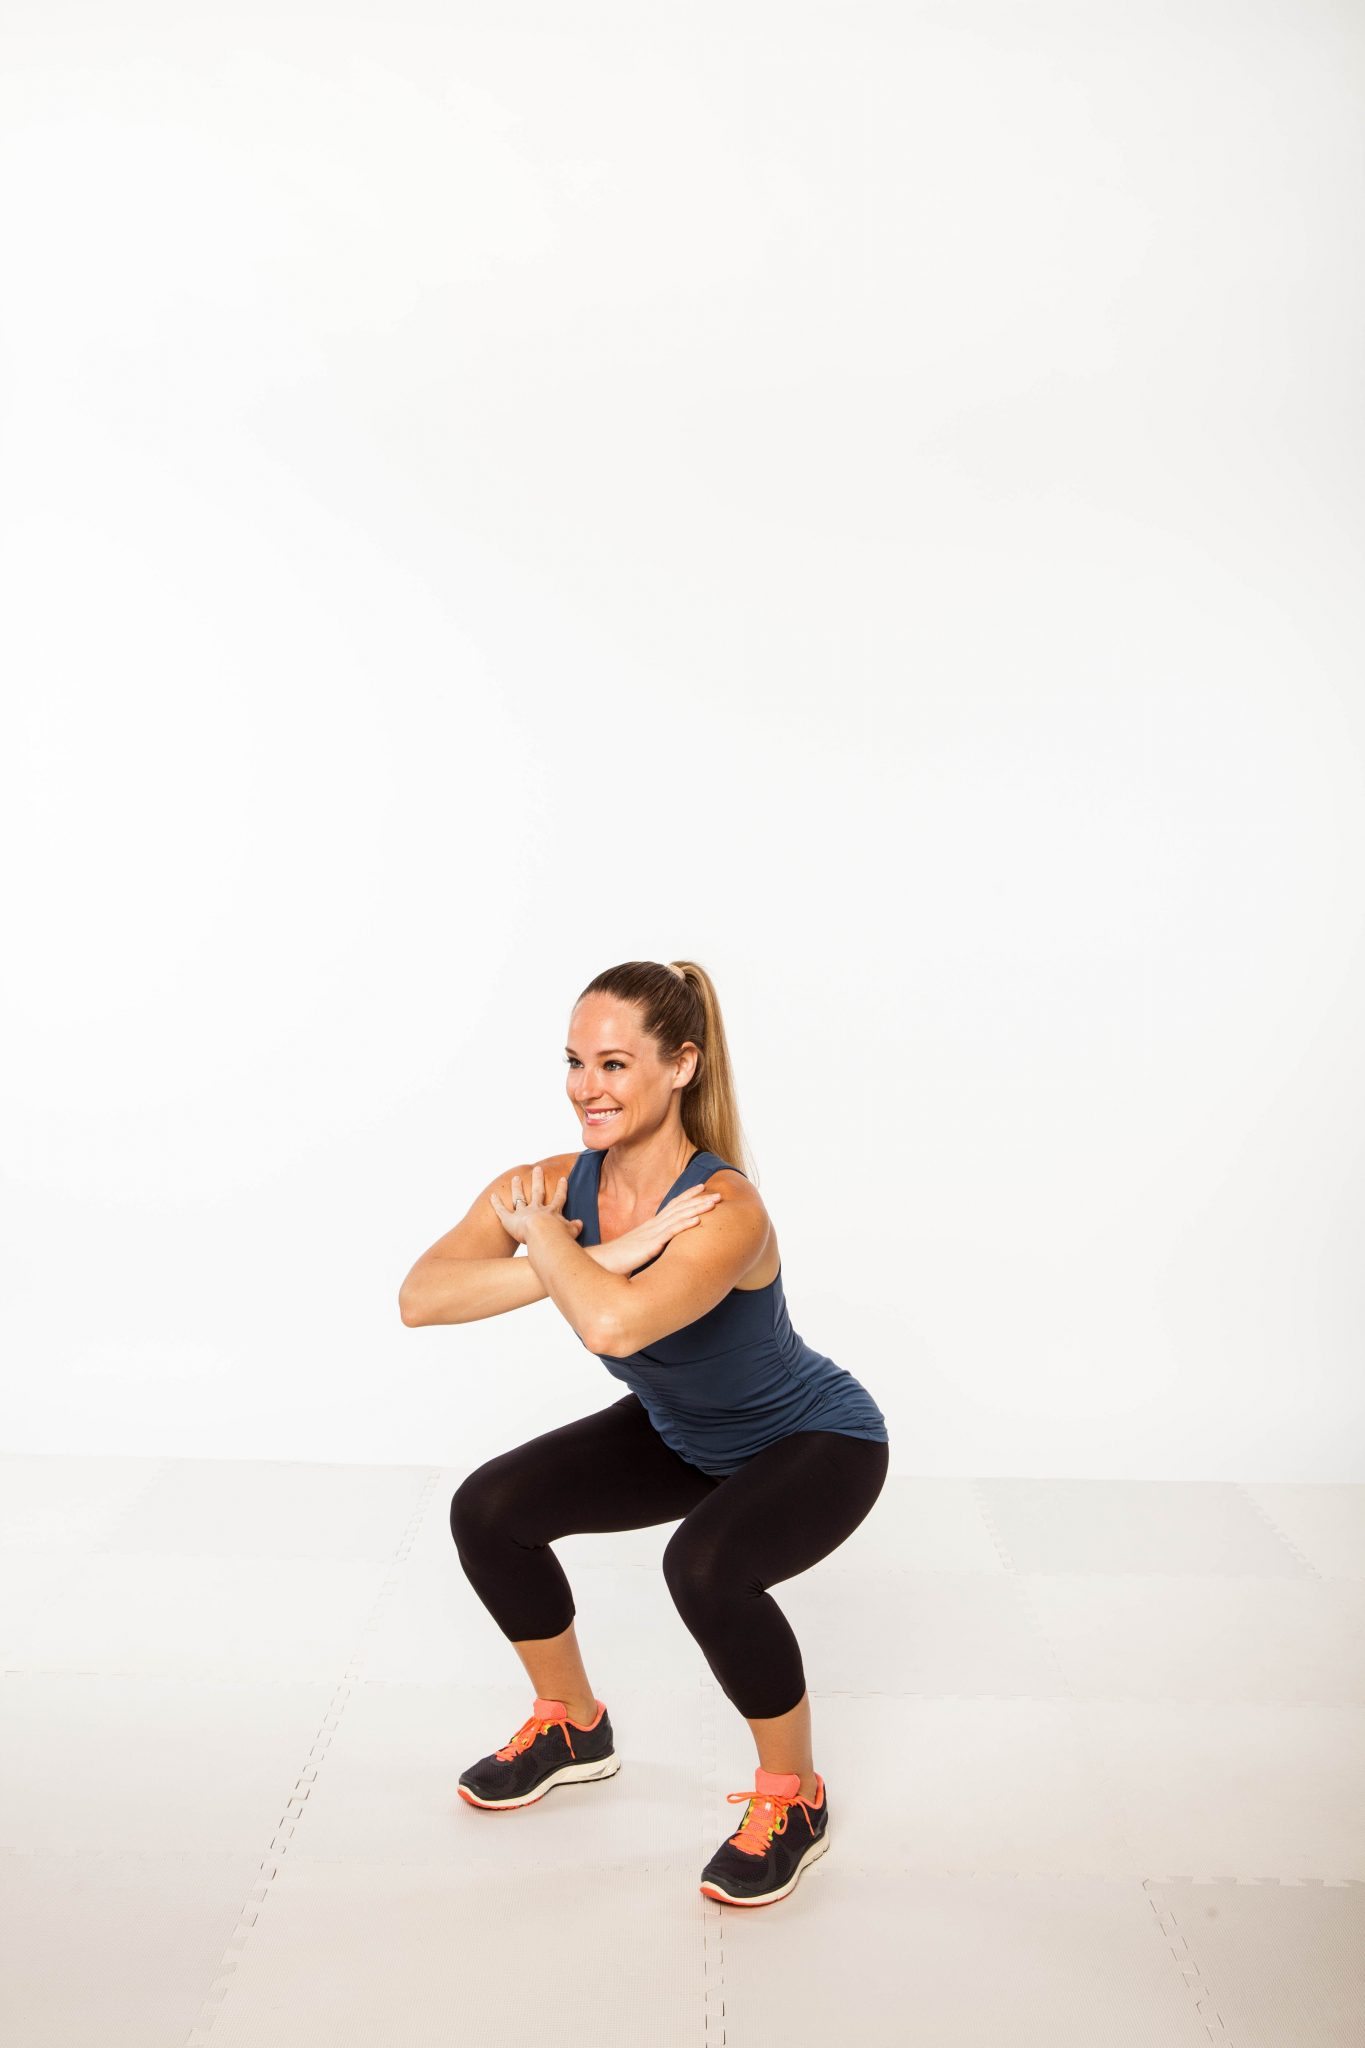
To do it: Stand with your feet hip-width apart with your arms crossed over chest. Lower into a squat by pushing your hips back (as if you were about to sit down in a chair), keeping chest lifted and knees behind toes. Hold for 30–60 seconds, then stand back up.
Still too much on the knees? Try to stand against a wall and lower into a “sitting” position to hold. You can also use a chair and lower as if about to sit down, hovering just above the seat, and hold. Repeat up to 3 times.
Standing Hip Extensions
Targets: Glutes
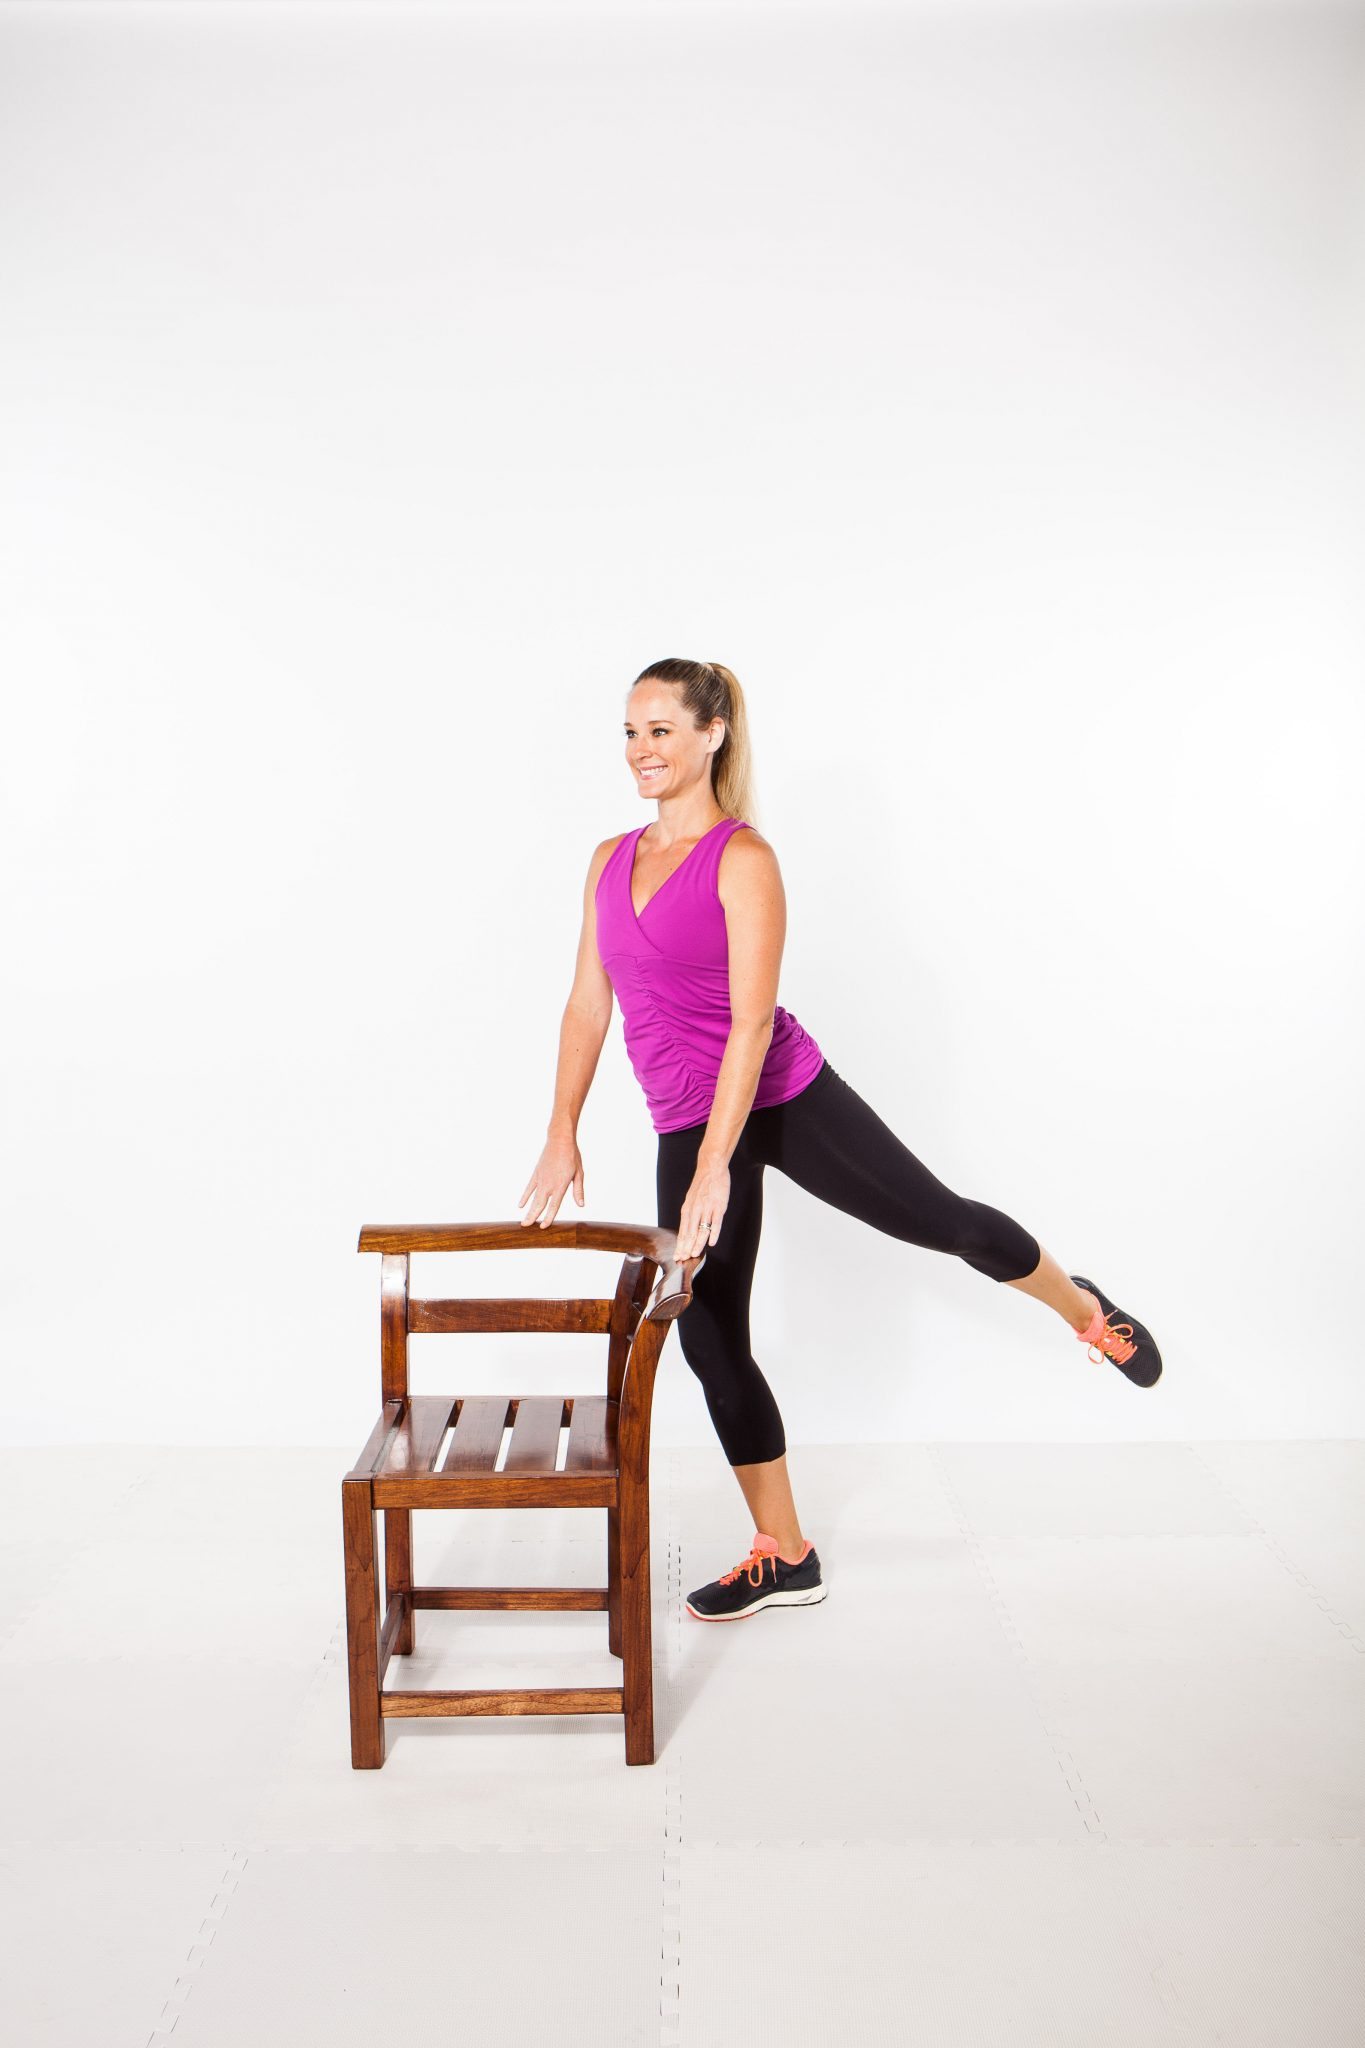
To do it: Holding on to the back of a sturdy chair for balance, extend 1 leg behind your hip with your toes lightly touching the floor and your standing leg slightly bent. Lift the leg up off of the floor behind your hip, squeezing your glutes and keeping your chest lifted and abs tight. Lower your leg to the floor. Try up to 3 sets of 20 reps on each side.
Hip Bridge Abduction
Targets: Hips, glutes, abs
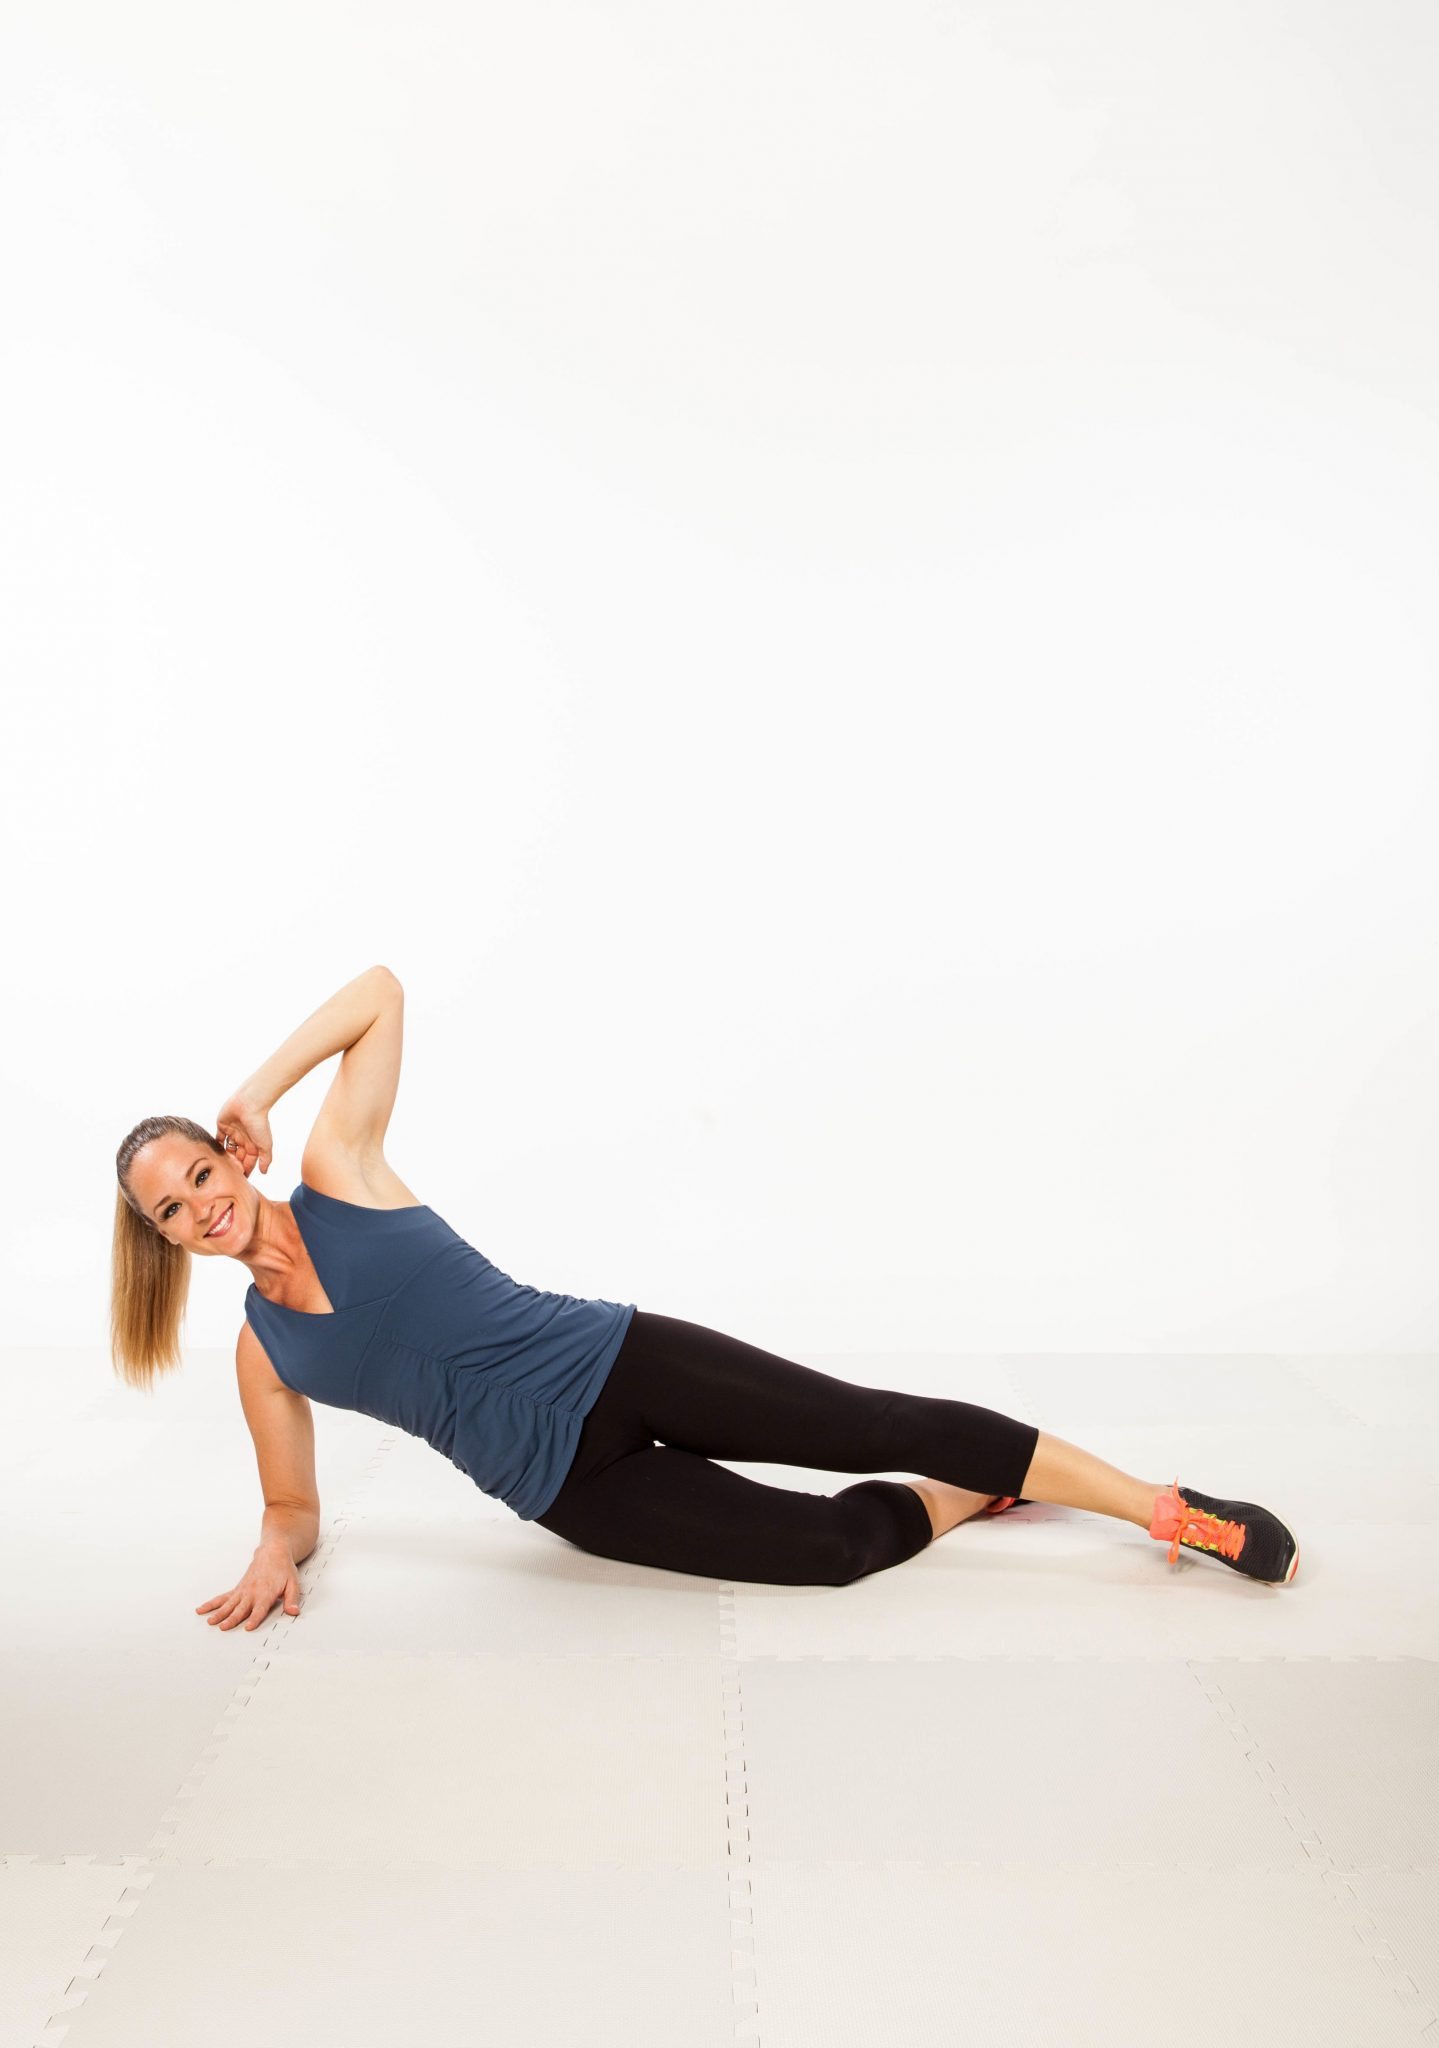
To do it: Start by lying on your side with your upper body propped up by your bent elbow and your opposite hand resting on your head. Extend both legs out to the side, bending bottom knee (keep both knees and hips stacked).
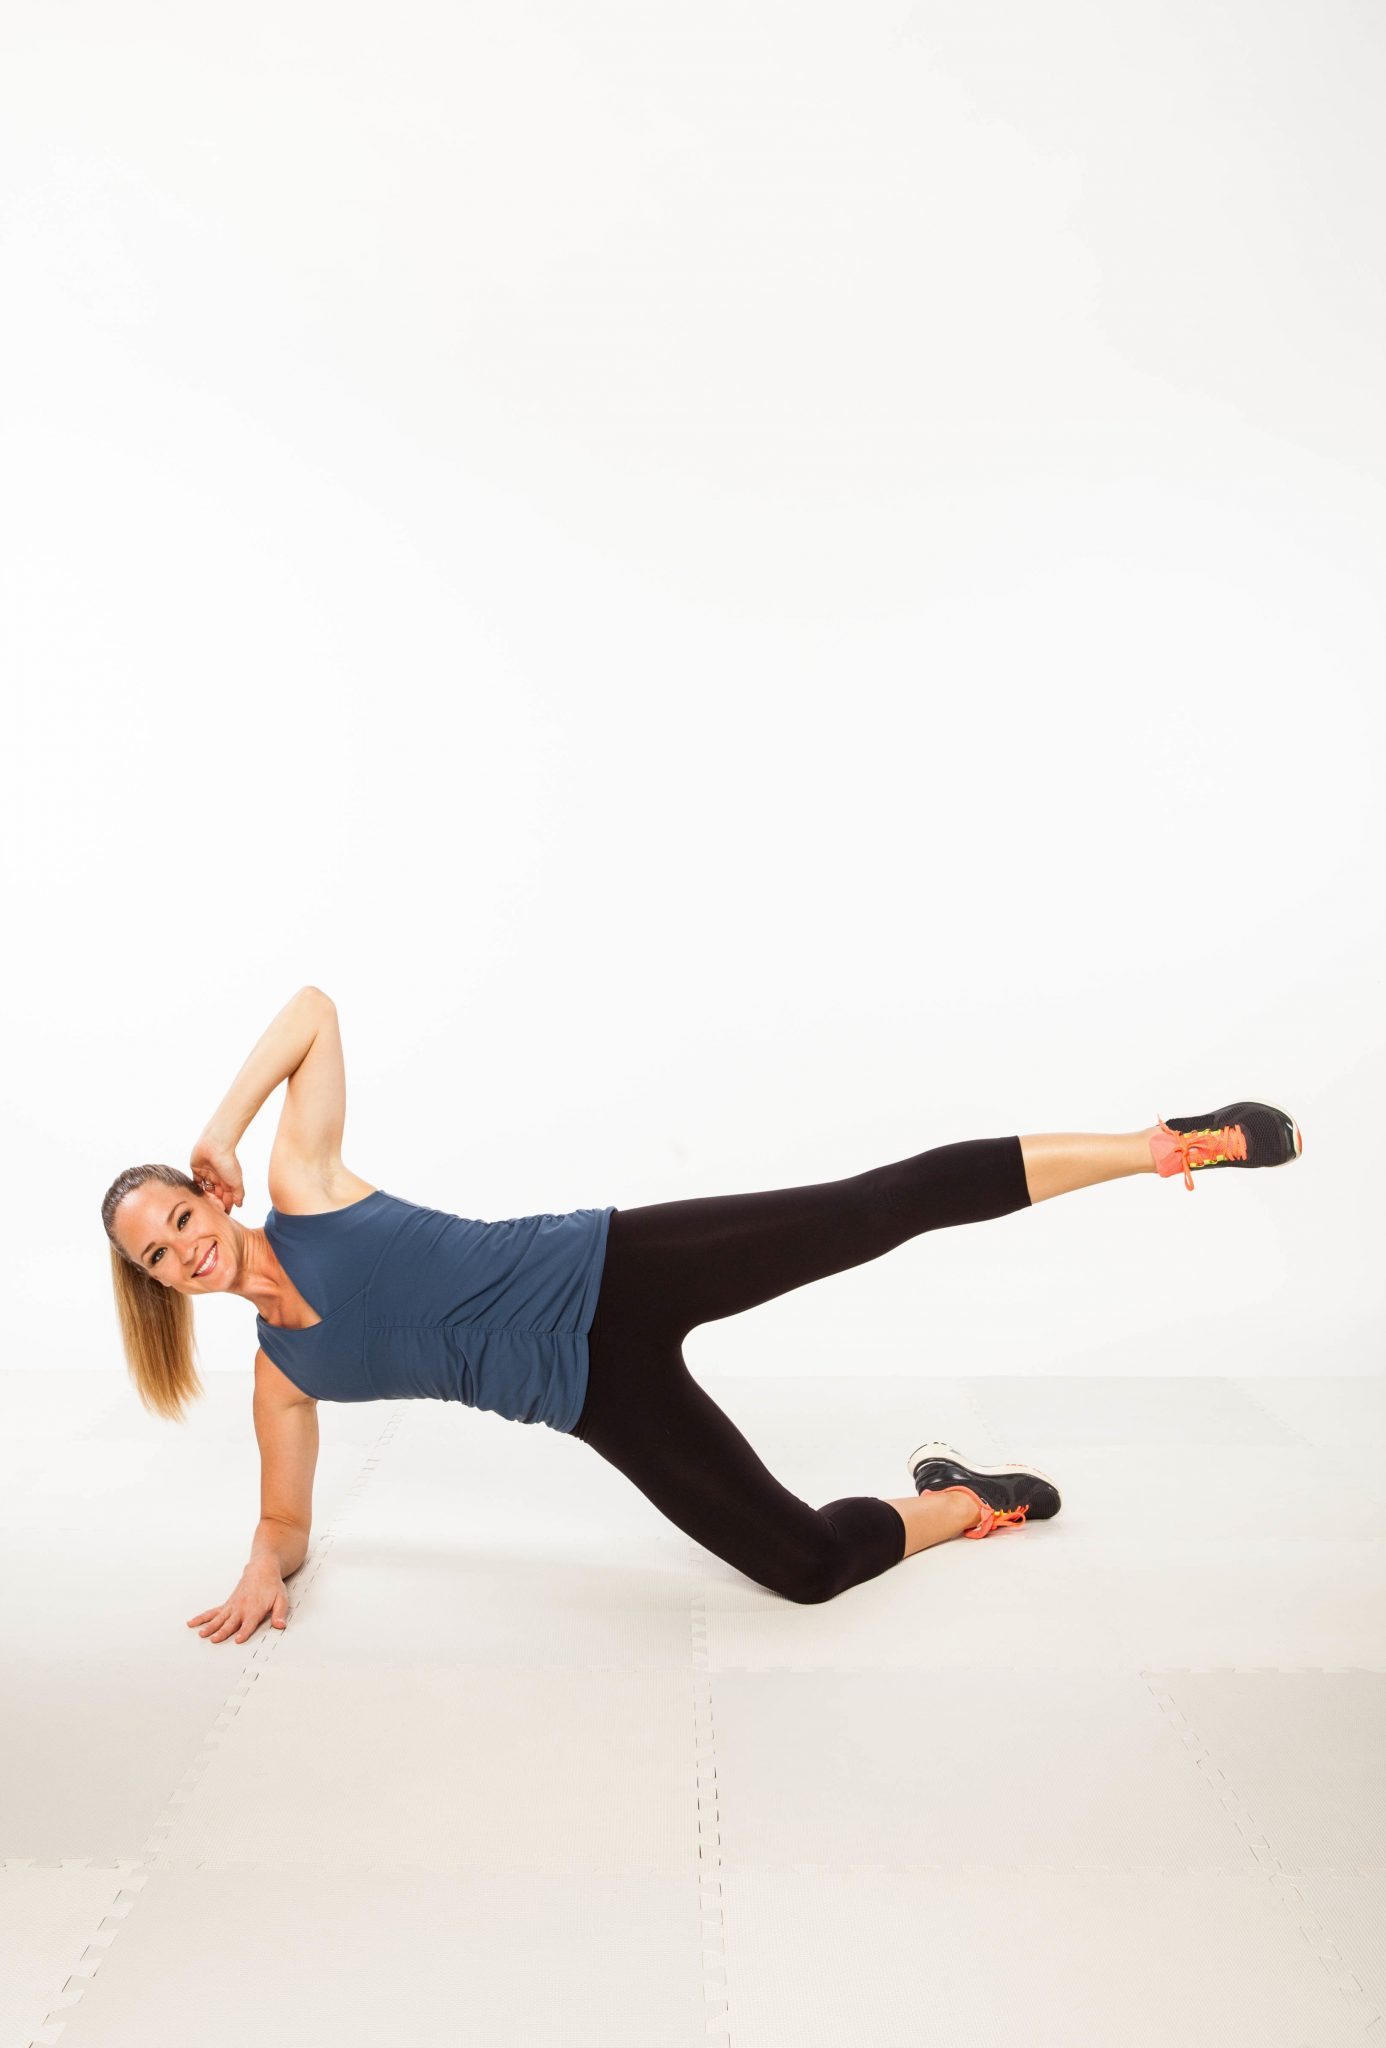
Lift your hips and top leg to just above hip height. Hold for 1 count, then lower hips and top leg back to the floor. Try up to 3 sets of 20 reps on each side.
Sliding Hamstring Curls
Targets: Hamstrings, thighs, glutes, lower back, abs
To do it: Start by lying on your back with your arms by your sides, knees bent, feet flexed, with heels pressed into centers of paper plates (try paper plates on a carpet, or two folded towels on hard floors). Lift your hips off floor and slide 1 foot out, extending the leg out (keeping your heel pressed against plate or towel) [A].
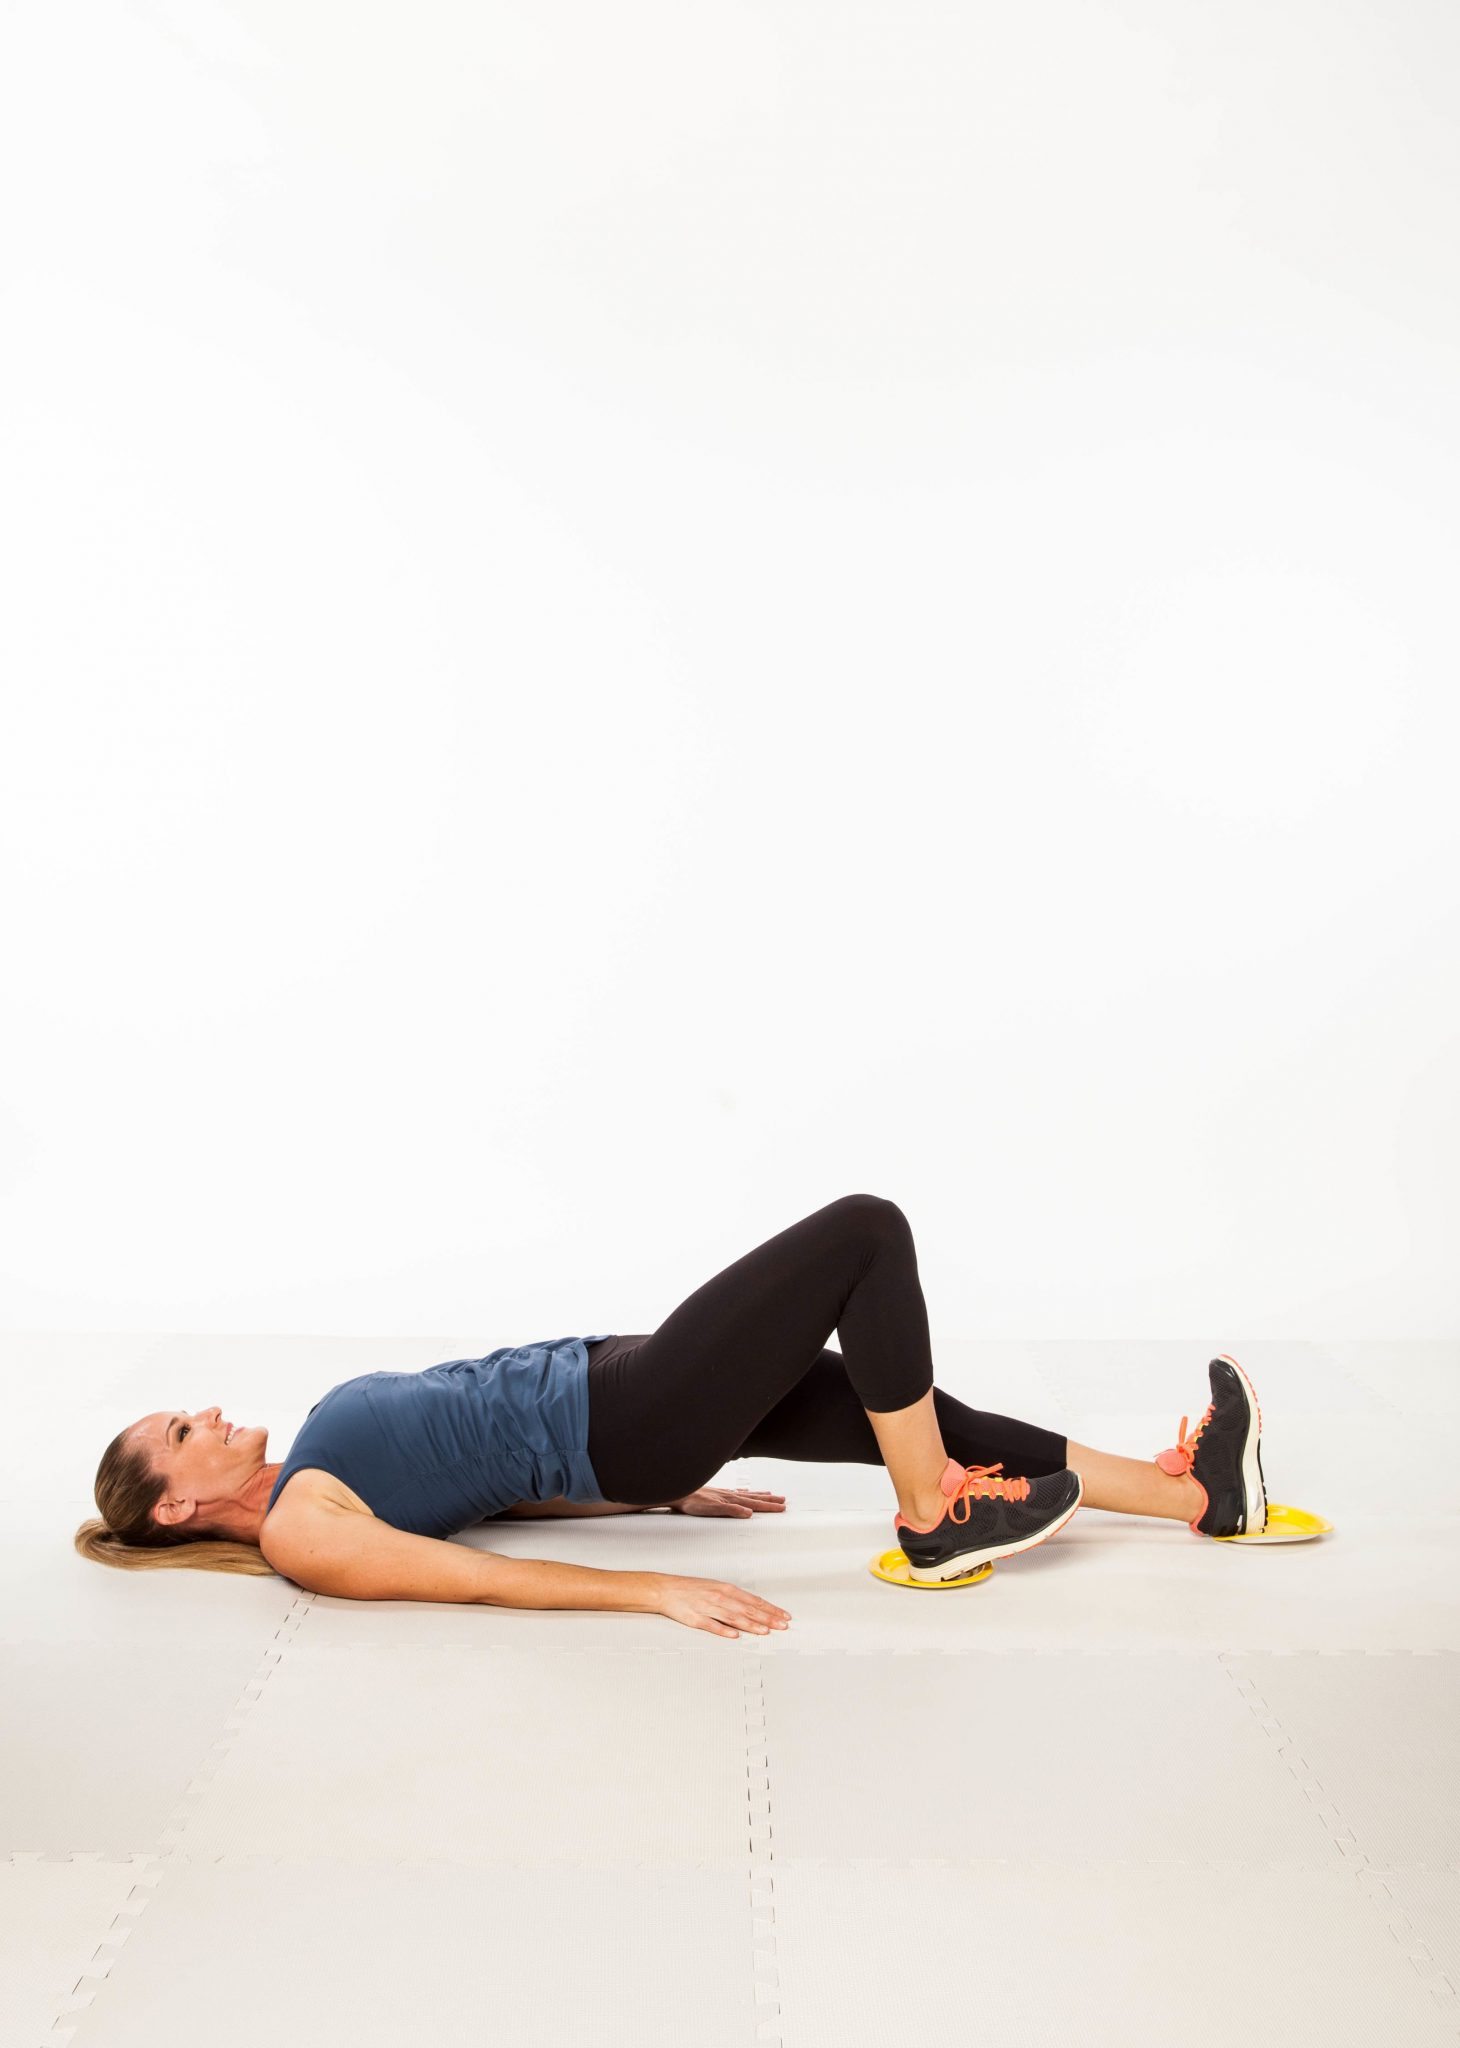
Quickly bend leg back in while sliding other leg out. That’s 1 rep. Try up to 3 sets of 20 reps.
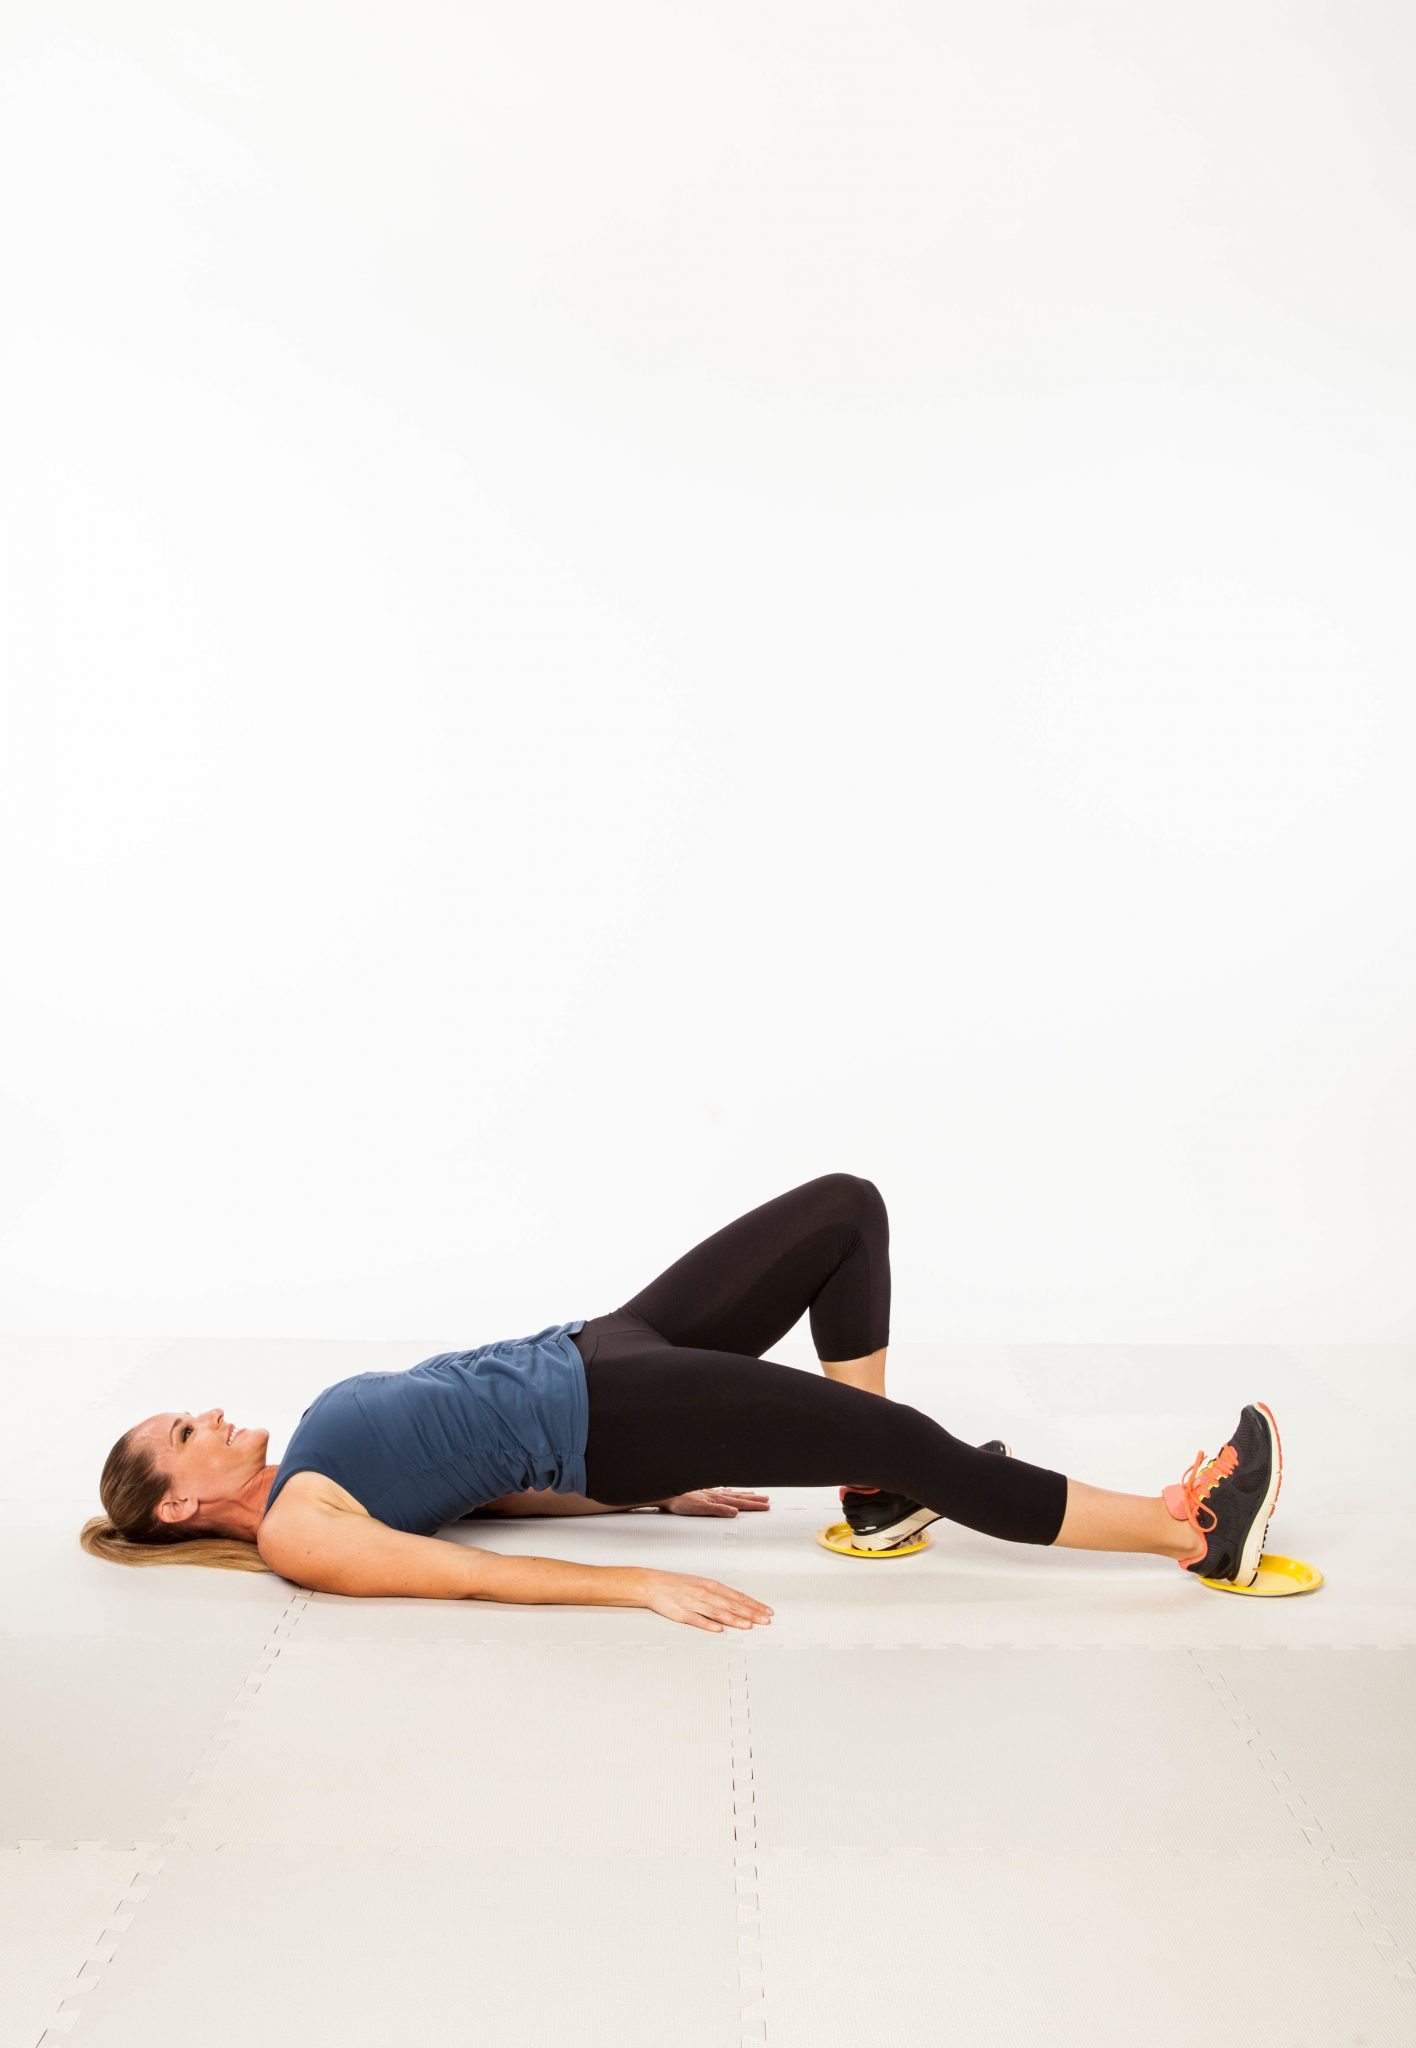
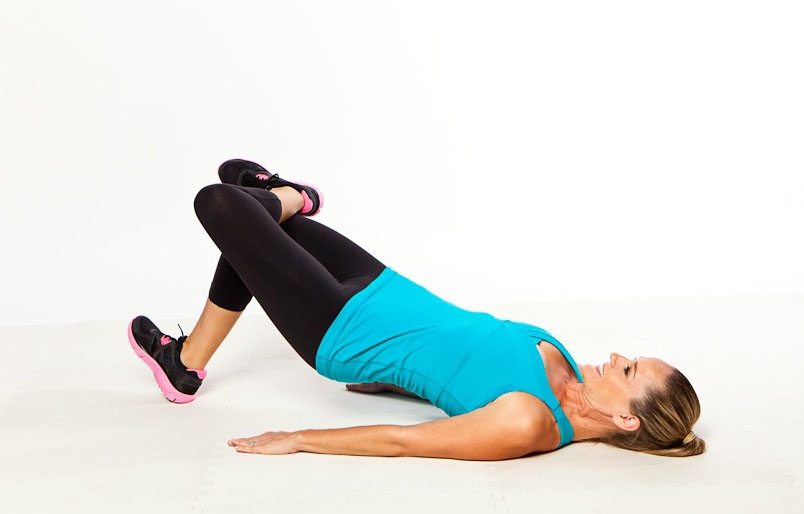
Figure-4 Heel Bridge
Targets: Glutes, hamstrings, lower back
To do it: Begin by lying face up with knees bent, feet flexed and arms by your sides. Cross 1 leg over the other, placing the ankle on top of the opposite thigh, knee opened to the side [A].
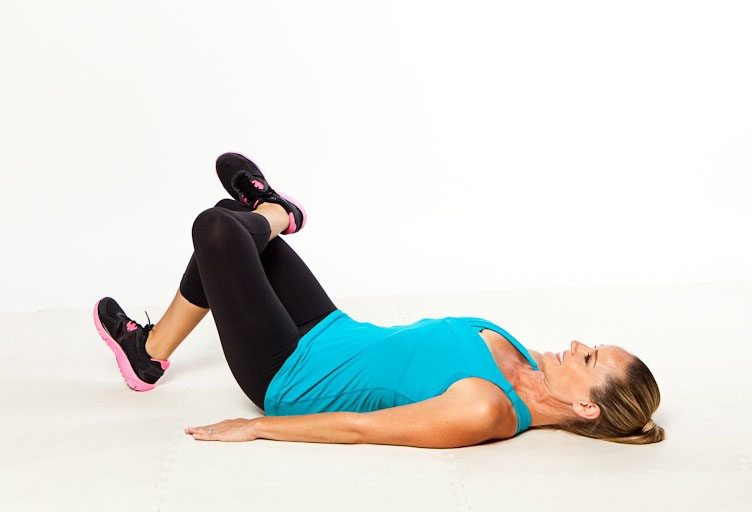
Lift hips up to the ceiling, and hold for 1 count. Return to the start. Try up to 3 sets of 20 reps on each side.
Frog Press
Targets: Glutes, lower back
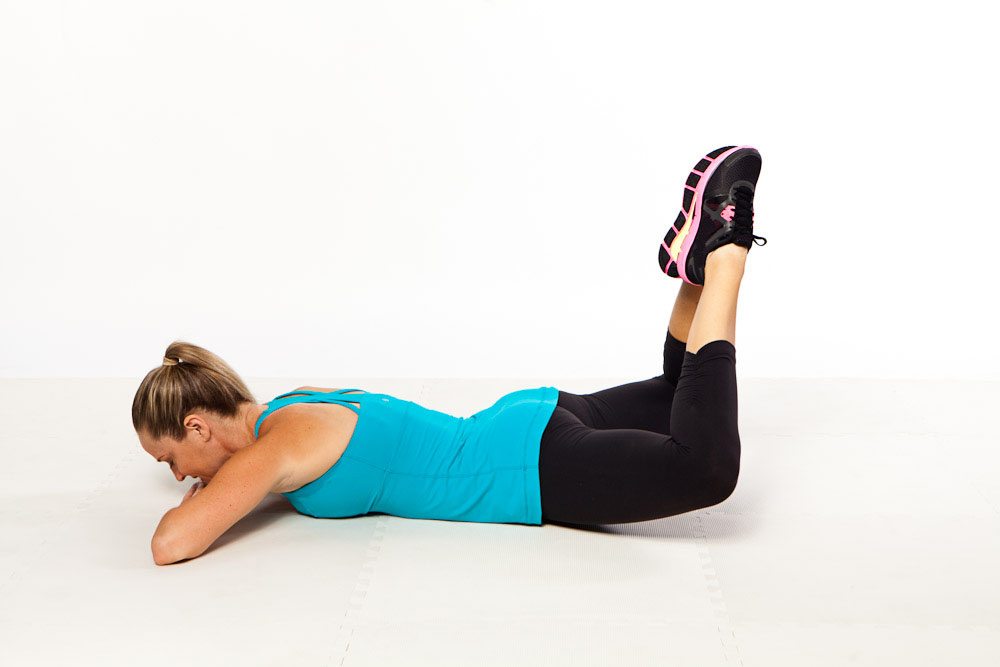
To do it: Lying face down with your arms bent, elbows open and chin resting on the back of your hands, bend your knees, point the toes and press the bottoms of feet together, opening knees to sides.
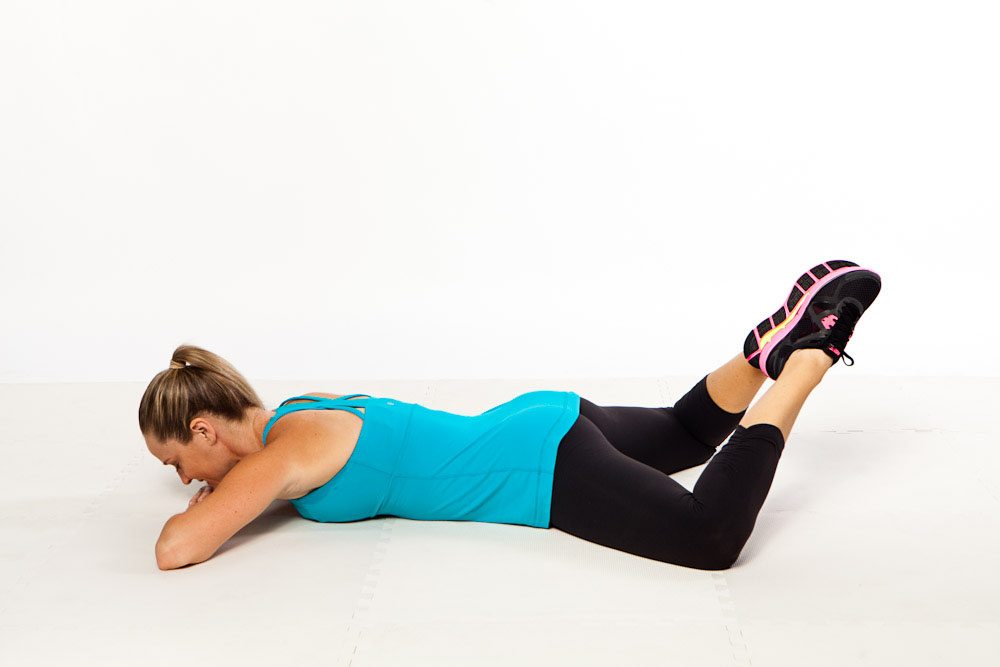
Keeping feet touching, squeeze glutes and lift thighs off the floor as high as possible. Hold for 1 count, and lower. Try up to 3 sets of 20 reps.
Inner Thigh Circles
Targets: Inner thighs, abs
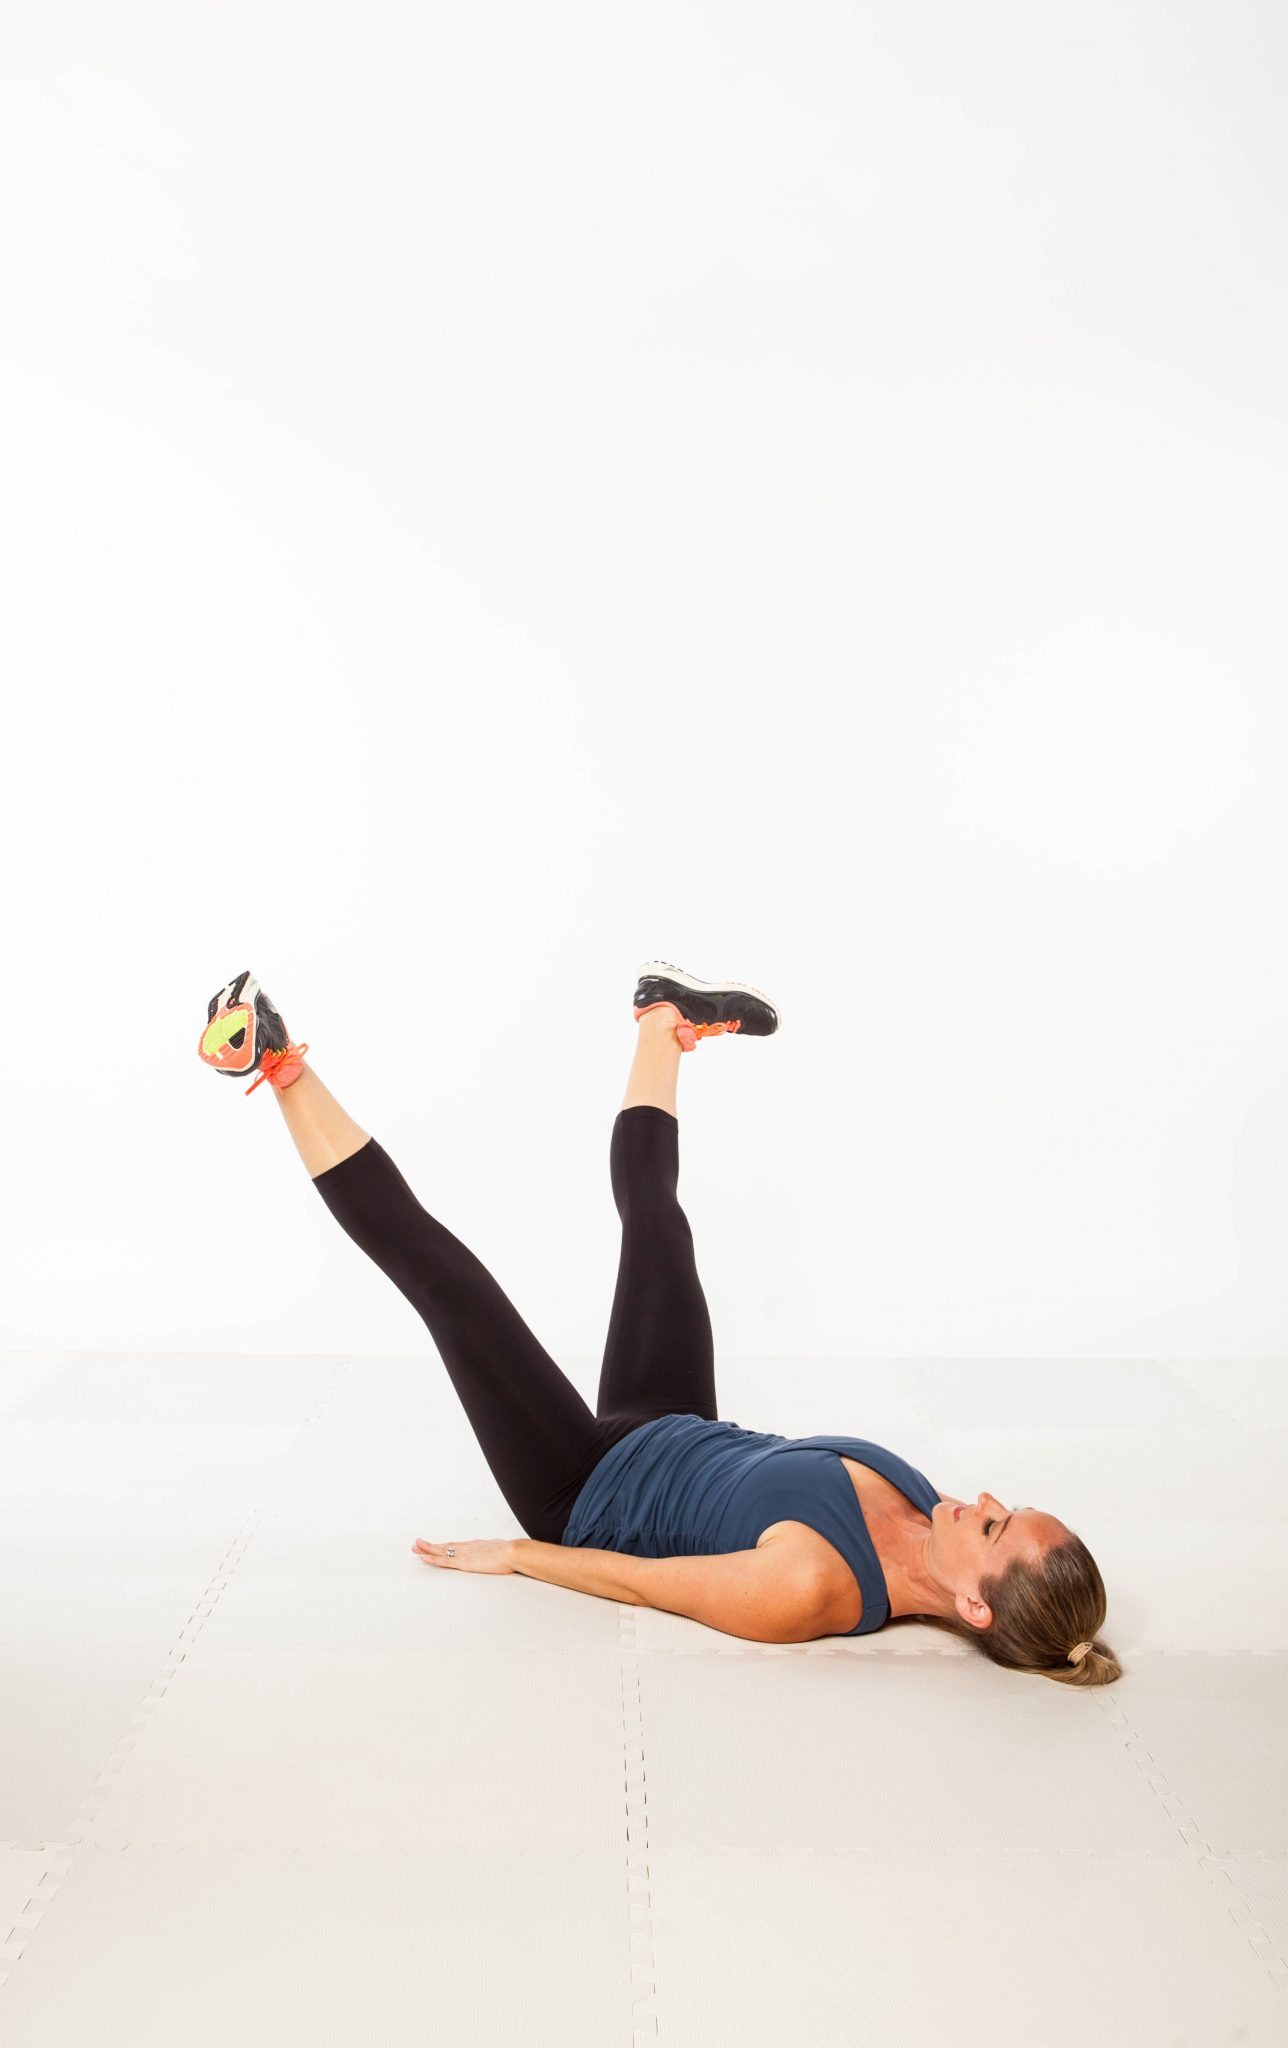
To do it: Begin by lying on your back with your arms by your sides, both legs extended straight up over the hips. Flex the feet and turn the legs out about 45 degrees, keeping heels touching. Brace abs in tight, and lower legs about 45 degrees toward the floor (avoid arching lower back).
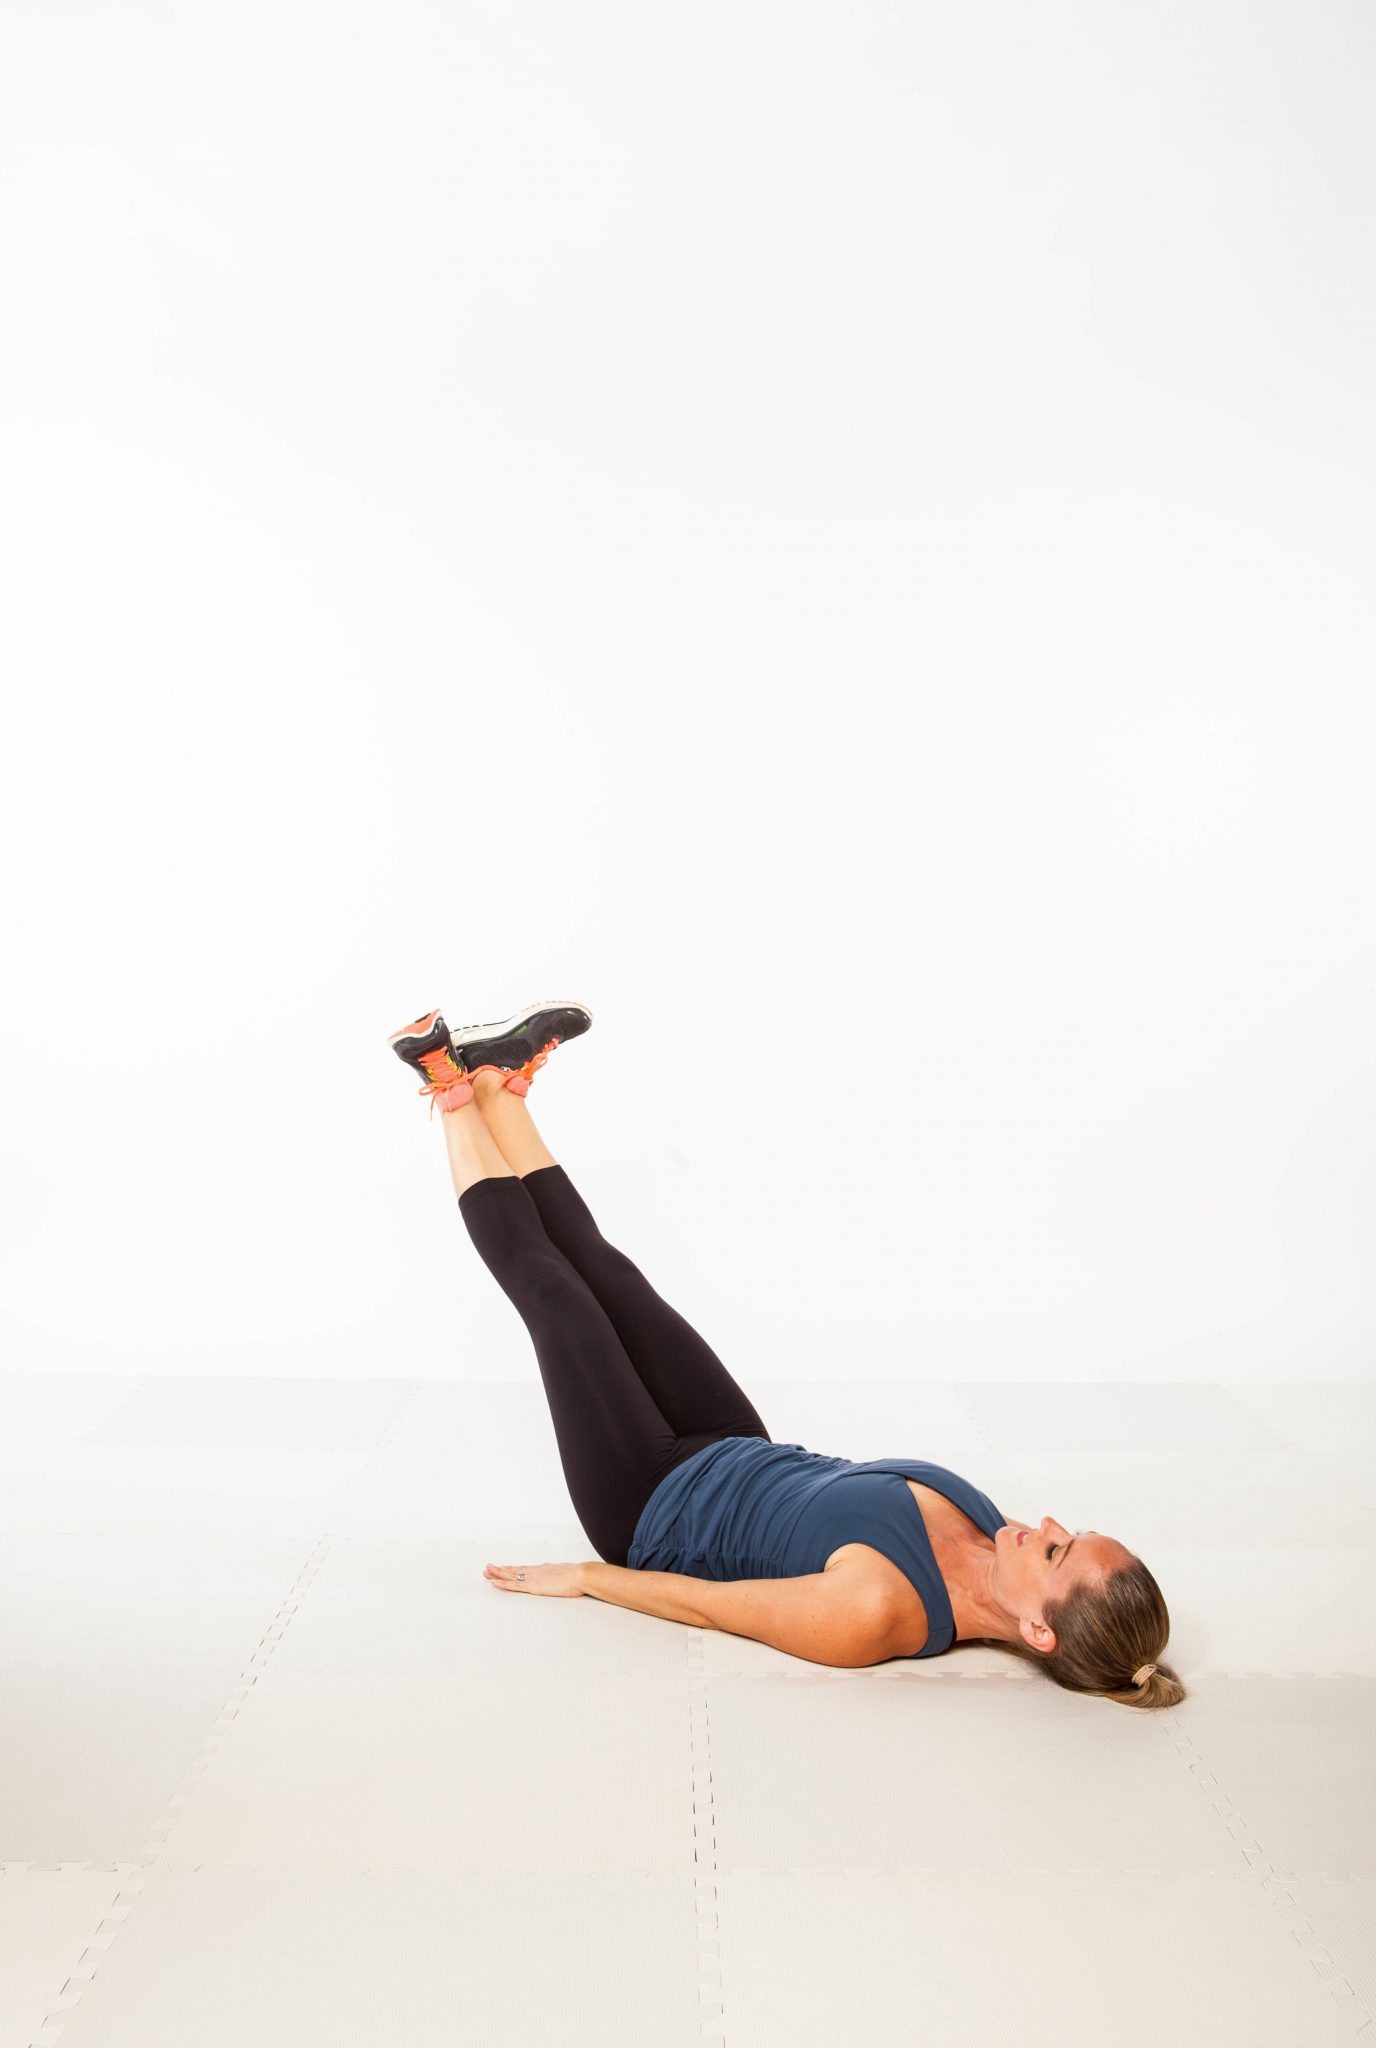
Open legs out to the sides, tracing a circle. Finish the circle by bringing heels back together directly above hips. That’s 1 rep. Do up to 3 sets of 20 reps (try reversing the direction of the circles for each set).
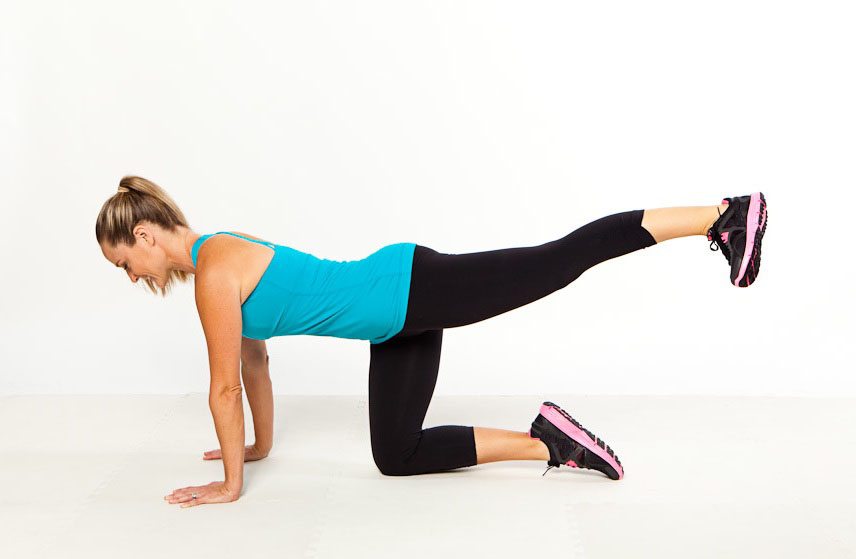
Kneeling Back Kick
Targets: Glutes, lower back, abs
To do it: Begin on your hands and knees, with hands under shoulders and knees under hips. Brace the abs in tight, flexing one foot, lifting knee several inches from the floor without shifting through your hips.
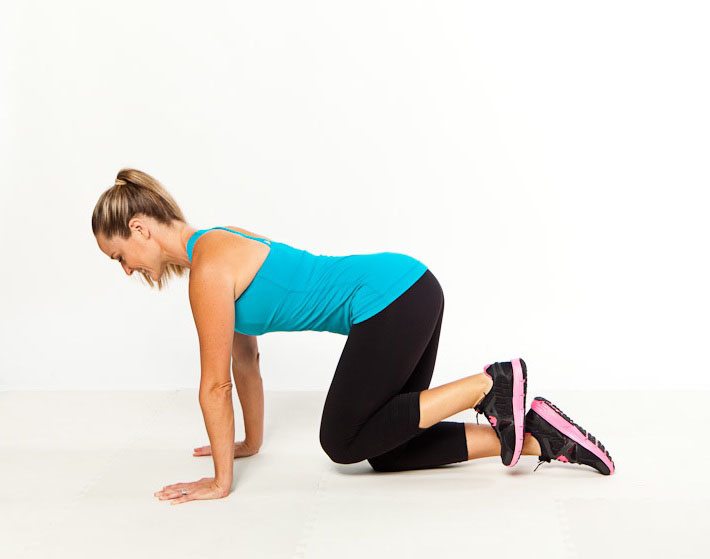
Extend 1 leg behind hip, pushing out through the heel. Bend knee back in (without touching the ground). Try up to 3 sets of 20 reps on each leg.
*Not all exercises are suitable for everyone. If you are working with an injury or a specific condition, be sure to get your doctor’s and/or physical therapist’s clearance first before trying these moves. And remember to listen to your body and skip any movements that don’t work well for your knees.
Looking for a complete low-impact program? Check out my all-new “Walk On: Walk the Weight Off” 30-day program! This jump-free series has everything you need to get great results without the excess wear and tear on your joints.
Photos by Vanessa Rogers Photography


