Snowy days aren’t just for sitting in the house. Winter craft activities are a great way to learn about the properties of snow.
On the next pages, you’ll find some fun snow activities such as making ice cream out of snow and learning how to examine snowflakes. These kids activities are simple and easy.
Ice Patrol
Find out how to help make sidewalks safe.
Winter’s Diamonds
Learn how to examine icicles.
As Warm as … Snow
Find out how to take snow’s temperature.
Snow Ice Cream
Make your own refreshing ice cream treat.
Examine Snowflakes
Is every snowflake really different? Find out how to tell.
Avalanche!
Make your own avalanche!
Where’s the North Pole?
Find north by making your own compass.
On the next page, find out how to make sidewalks safe in the winter.
For more fun activities and winter crafts, check out:
- Snow Crafts for Kids
- Snow Games for Kids
- Winter Crafts
- Winter Crafts for Kids
- Winter Experiments
Contents
- Ice Patrol
- Winter's Diamonds
- As Warm as … Snow?
- Snow Ice Cream
- Examine Snowflakes
- Avalanche!
- Where's the North Pole?
Ice Patrol
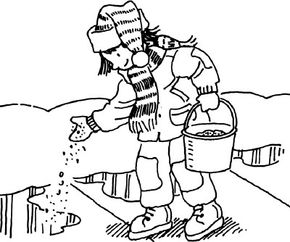 “Use rock salt to help melt ice.
Sidewalk ice can be a serious danger for the elderly. With this fun winter activity, you can be the ice patrol and help keep them safe.
Ice Patrol
What You’ll Need:
Cat litter
Sand
Rock salt
Bucket
Winter snowfall means fun to most kids — sledding, snowball fights, and frosty activities galore. But to senior citizens, winter weather means icy sidewalks and all the danger that goes with them. If you have elderly people in your neighborhood, do a weekly ice patrol to help keep them safe.
If you find a patch of stubborn ice on the sidewalk that just won’t go away, ask your neighbor if you can sprinkle it with a mix of sand, rock salt, and cat litter. The rock salt will help melt the ice. The cat litter will soak up the frosty water. And the sand will help keep the ice from being slippery until the whole process kicks into action. But don’t forget to ask permission first!
Keep reading to find out how to make winter’s gems — icicles!
For more fun activities and winter crafts, check out:
- Snow Crafts
- Snow Games
- Winter Crafts
- Winter Crafts for Kids
- Winter Experiments
Winter's Diamonds
If you want to make icicles, don’t forget the most important ingredient: a cold winter night. In this fun winter activity, you’ll learn how to make winter’s diamonds.
What You’ll Need:
Pencil
Plastic cup
String
Water
Needle or pin
How to Make Winter’s Diamonds
Using a sharp pencil, poke three or four holes around the lip of a plastic cup. Tie several inches of string through each hole, then tie the ends of the strings together to make a hanger for the cup.
Use a needle or pin to poke a very small hole in the bottom of the cup. Be careful not to poke yourself.
Fill the cup with water. The water should drip very slowly out the hole in the bottom. On a cold night, before you go to bed, hang the cup outside on a branch or nail. Overnight, an icicle will form at the bottom of the cup.
Check out the next page to find out how to take snow’s temperature.
For more fun activities and winter crafts, check out:
- Snow Crafts
- Snow Games
- Winter Crafts
- Winter Crafts for Kids
- Winter Experiments
As Warm as … Snow?
We all know snow is cold, but can it help keep you warm? Try this "As Warm as … Snow?" activity, which will show you how to take a snowbank’s temperature.
As Warm as … Snow?
What You’ll Need:
Two thermometers
Snow
Stick or branch
For this activity, you’ll need to wait for a day when it’s very cold (at least 10 degrees Fahrenheit or lower). Be sure to dress warmly!
Find a large snowbank and dig a small hole deep into its base. Put a thermometer in the hole. Now put a second thermometer outside the snowbank but also outside of the rays of the sun. Put a stick or branch nearby to mark the spot. Leave both thermometers overnight.
The next day, compare the two thermometers. Is there a difference in the temperatures outside and inside the snowbank?
The colder it gets outside, the bigger the difference you’ll find between the two temperatures. This is because snow has the ability to insulate and protect things from even colder weather. And that’s why when it gets really cold, small animals will tunnel into the snow to shelter themselves from the deep chill.
Turn to the next page to learn how to make a tasty treat from snow.
For more fun activities and winter crafts, check out:
- Snow Crafts
- Snow Games
- Winter Crafts
- Winter Crafts for Kids
- Winter Experiments
Snow Ice Cream
 “Make your own Snow Ice Cream.
Long ago people figured out the easiest way to make ice cream is to use snow. Find out how to make your own Snow Ice Cream with this fun winter activity.
What You’ll Need:
Clean snow
Bowl
Sugar
Vanilla extract
Milk or cream
How to Make Snow Ice Cream
How to MakeSnow Ice Cream
Scoop some freshly fallen snow into a big, chilled bowl. (Make sure the snow you take is clean and white. If the snow is brown or yellow, it will taste yucky.)
Nestle the bowl in the snow to keep it cold while you make snow ice cream. Add a little sugar, a few drops of vanilla extract, and some very cold milk or cream. Stir together and eat.
You might like to take your tasty treat inside to enjoy by a warm fire. Experiment with different flavors of snow ice cream. Try adding some cinnamon or cocoa powder.
Check out the next page to learn how to examine snowflakes.
For more fun activities and winter crafts, check out:
- Snow Crafts
- Snow Games
- Winter Crafts
- Winter Crafts for Kids
- Winter Experiments
Examine Snowflakes
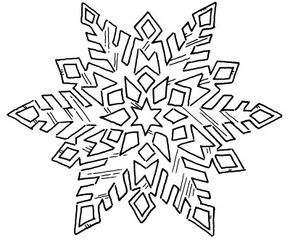 “Examine the differences between snowflakes.
You’ve heard that no two snowflakes are alike, right? Examine snowflakes and see if that’s true.
Examine Snowflakes
What You’ll Need:
Black construction paper
Magnifying glass
Do this activity on a snowy day. Put a piece of black construction paper outside where it’s cold, but not where it will get snowed on. Let the paper chill for several minutes.
Then catch snowflakes on the paper and look at them under a magnifying glass.
Are they really all different from one another? In what ways are they all alike? Scientists have found that snowflakes come in seven basic geometric shapes. However, snowflakes have infinite different — and beautiful — varieties within those categories.
When you go inside, you might want to draw snowflakes as they looked under the magnifying glass.
On the next page, you’ll learn how to make your own avalanche.
For more fun activities and winter crafts, check out:
- Snow Crafts
- Snow Games
- Winter Crafts
- Winter Crafts for Kids
- Winter Experiments
Snowflake Fact
Snowflakes are actually six-sided ice crystals, ones that are created in clouds when the temperature is below freezing. In order for you to have good snow for snowmen and snowball fights, the air has to stay cold as the snowflakes fall. Otherwise the ice crystals will melt. But, if the air is too cold throughout the snowflake’s descent, the snow will not stick together well enough for snowballs.
Avalanche!
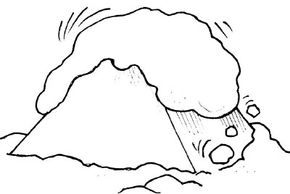 “Make your own avalanche!
Ever wondered how an avalanche works? Try this winter activity on for size. Simulated disasters help you understand the real thing.
Avalanche!
What You’ll Need:
Cardboard box (cut in half, corner to corner)
Mittens
Cold water
Snow
On a cold day, cut a cardboard box in half, corner to corner, creating a cardboard peak that will sit flat on the ground.
Wet the box and let it freeze, peak to the sky. Once it’s frozen, wet it again to create a second, smoother layer of ice. Now let snow blanket the icy peak.
Will the snow slide off that steep sheet of ice? A soft bump will help you find out — and simulate a real avalanche.
On the next page, you’ll learn how to make your own compass to find out which way is north.
For more fun activities and winter crafts, check out:
- Snow Crafts
- Snow Games
- Winter Crafts
- Winter Crafts for Kids
- Winter Experiments
Where's the North Pole?
 “Use a pie pan to make your own compass.
Where’s the North Pole? If you follow the steps of this snow activity, you’ll find the answer by making your own handy homemade compass.
Where’s the North Pole?
What You’ll Need:
Pie pan
Water
Dishwashing liquid
Magnet
Needle
1/4-inch slice of cork
Fill a pie pan with water. Add a small amount of dishwashing liquid.
Now you’ll need to magnetize a needle. To do this, use a bar magnet with the north end marked. Scrape the needle across the north end of the magnet, from the eye of the needle to its point. Do this about 15 times. It’s important to scrape the needle in the same direction every time — don’t rub it back and forth on the magnet.
Carefully poke the needle through a small piece of cork. Float the cork in the middle of the pie pan. Like magic, the needle will always point north.
If you walked far enough in that direction, you’d find yourself at the North Pole! That’s because the Earth is like a giant magnet, with one end in the North Pole and the other end in the South Pole.
ABOUT THE CRAFT DESIGNERS
For more fun activities and winter crafts, check out:
- Snow Crafts
- Snow Games
- Winter Crafts
- Winter Crafts for Kids
- Winter Experiments


